
In this tutorial, we’ll use JavaScript with React to build a simple “tasks” application where users can log in with a third-party provider using Auth0. We will use Auth0, but you can use any third-party identity provider. With Ditto, each app can use multiple identity providers.
If you’re new to Auth0, please complete an Auth0 quickstart tutorial before starting this tutorial.
For the full application code in JavaScript, see the code on GitHub.
Basic App without Auth
We’ll start with a very basic “tasks” app written in React.
The full code for this section is available at this commit.
- First run
git clone -b init git@github.com:getditto-shared/js-react-auth-tutorial && cd js-react-auth-tutorial && git switch -c mainand thennpm install. - If you haven't yet, sign in or create an account on the Ditto Portal and create an App.
- Once you have an App, copy your App ID and Playground Token into
src/ditto.js. - Run
npm run start
Once the app builds, your browser should open to a localhost url with the tasks app.
In the next section, we’ll start adding authentication to the app.
Configure Auth0
Before jumping into the code, we need some information from Auth0:
- Domain
- Client ID
- API Audience
To get these pieces, go to auth0.com and use their web interface to create and configure a new Auth0 application and API. This is the authorization server that Ditto will ping to manage sign-ins for this app.
- Login to auth0.com (or create an account and login).
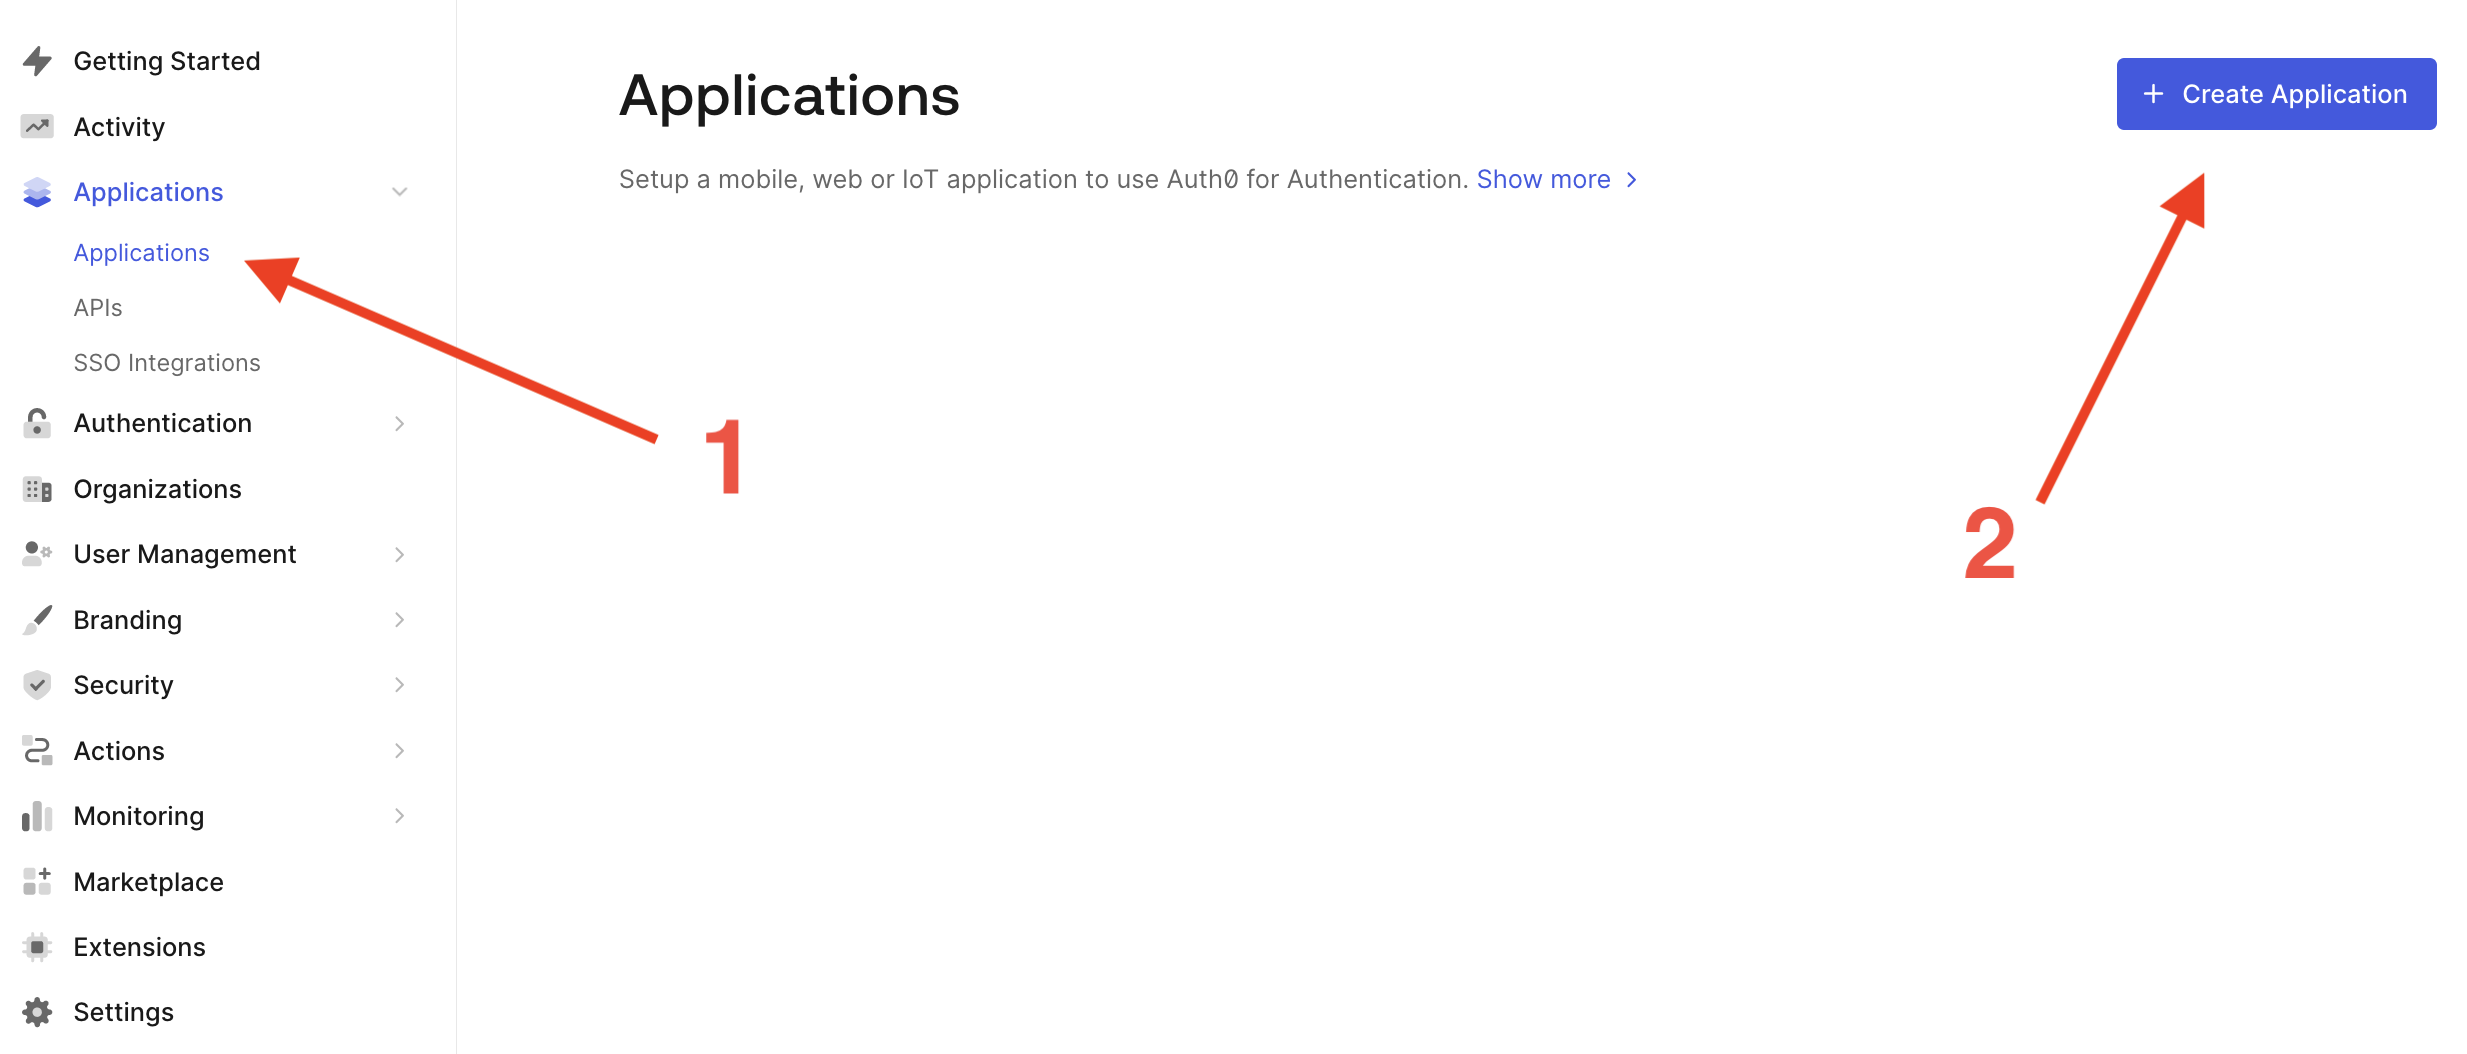
- Create a new Auth0 application: In the menu on the left side of the Auth0 dashboard, click on Applications. This will expand the Applications menu. Select the first item in that menu, which also has the name Applications. Then click the
Create Applicationbutton.
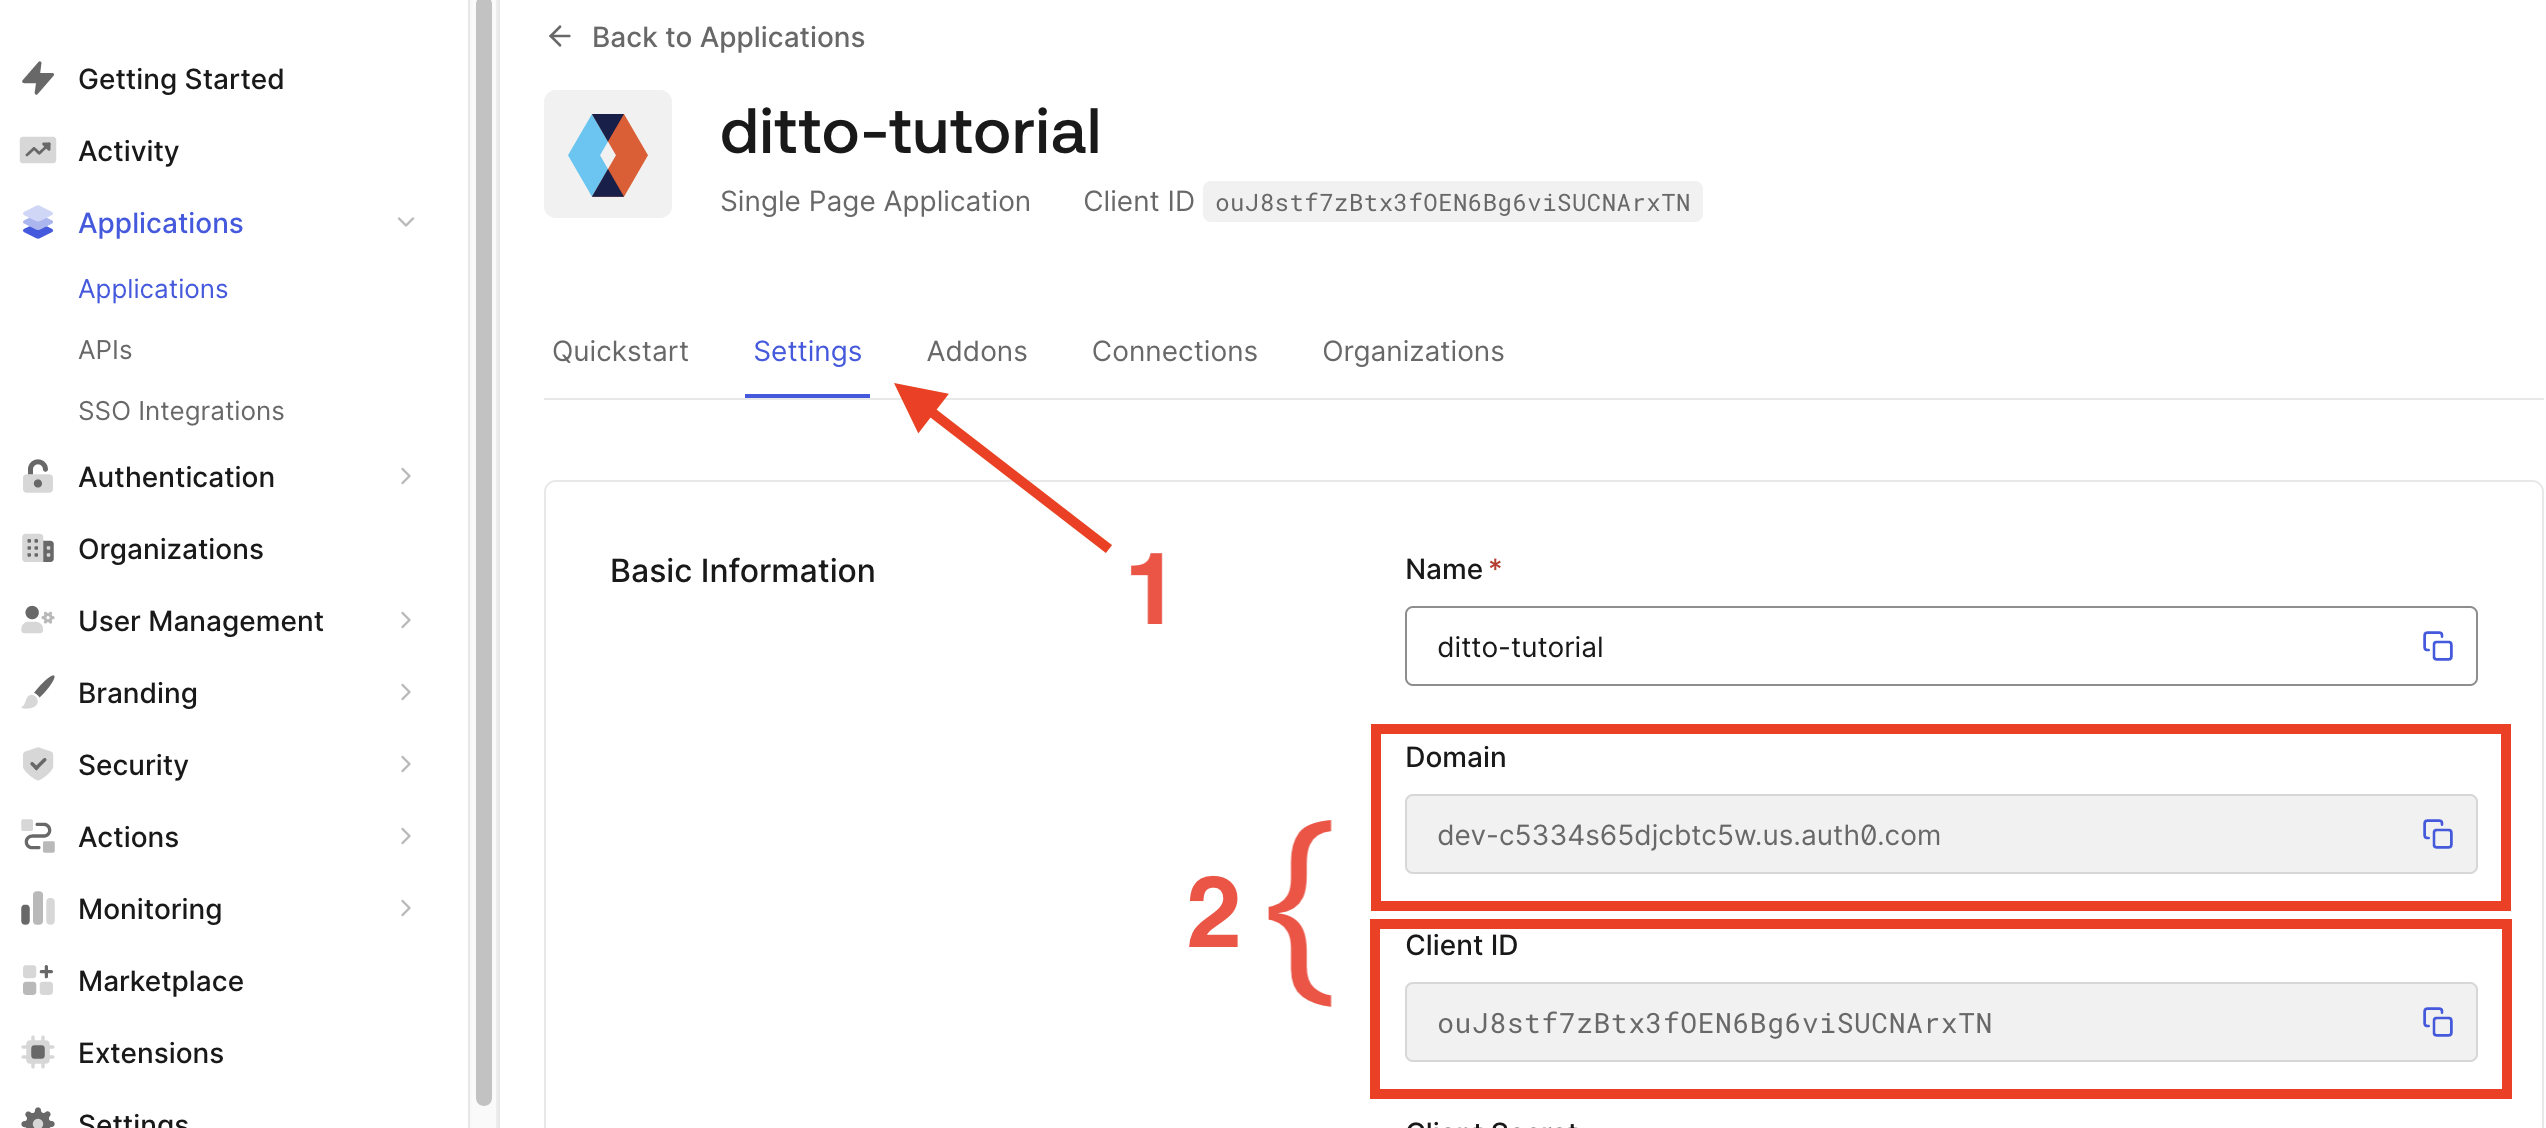
- Click on your new application and go to the Settings tab. From here, copy the
DomainandClient ID.
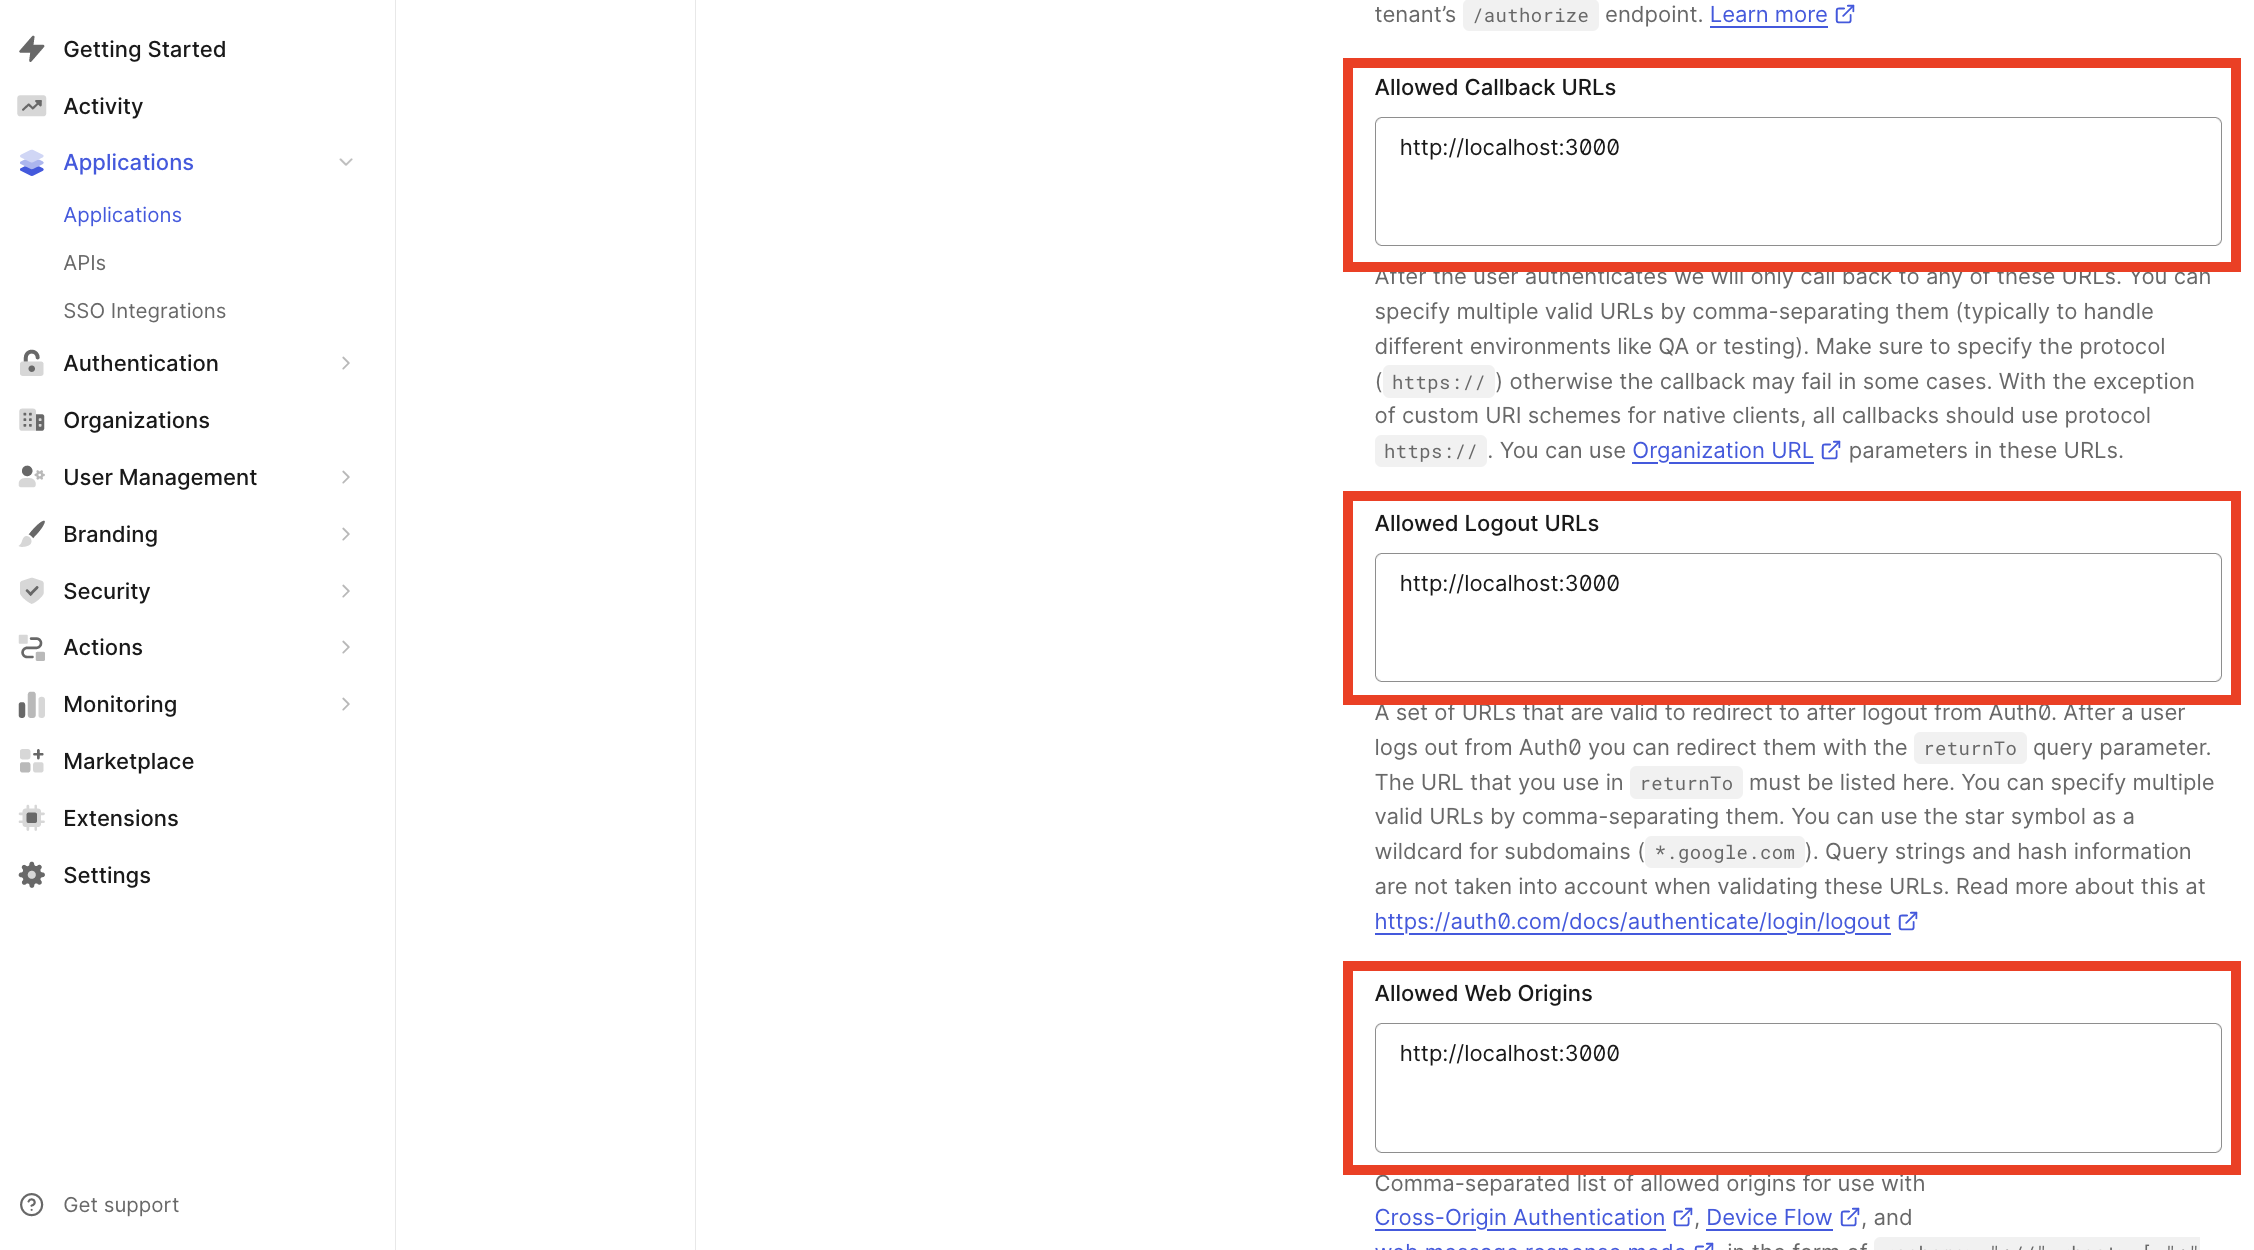
- Scrolling down, configure Allowed Callbacks URLs, Allowed Web Origins, and Allowed Logout URLs. For this tutorial, we’re using
localhost:3000, but you would use your own URLs in production.
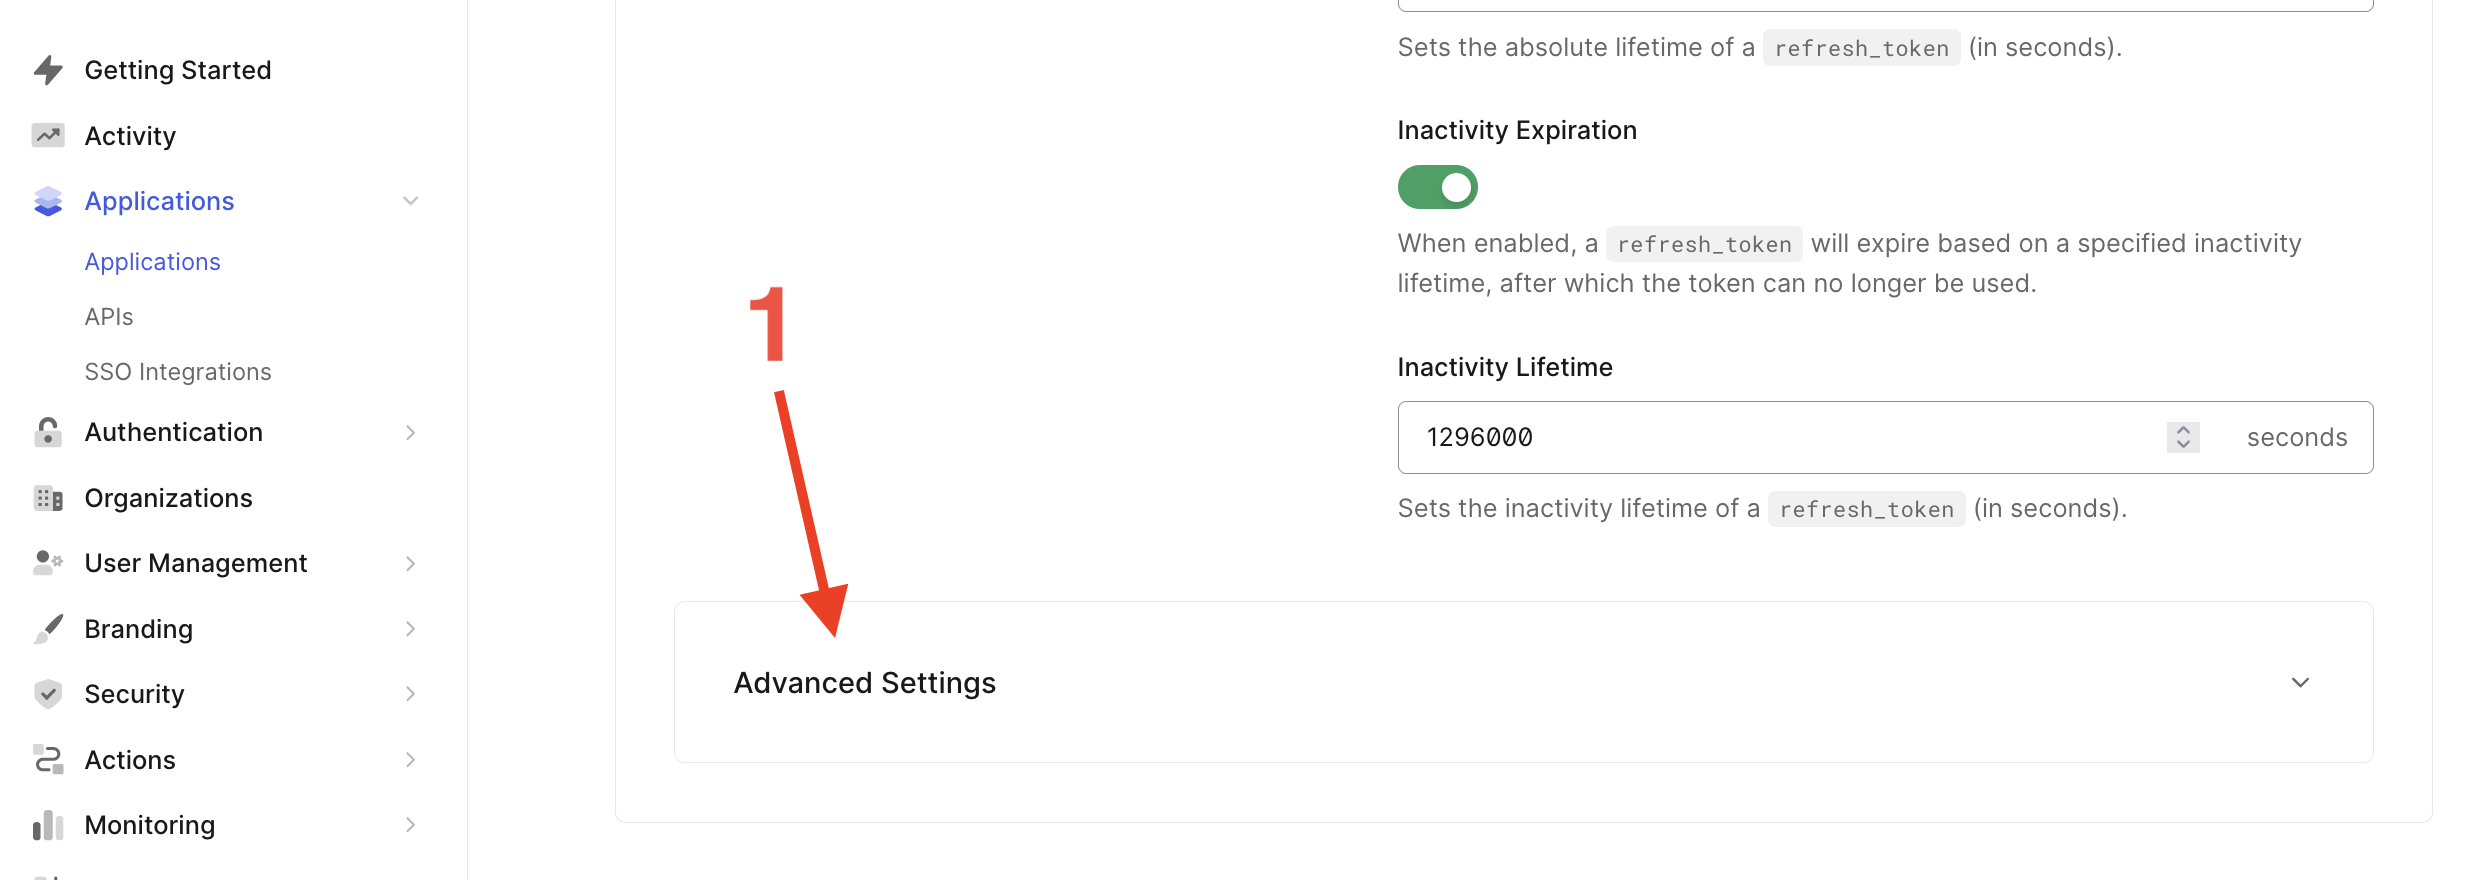
- Scrolling further down, configure the allowed grant types for your application. Click on Advanced Settings and choose the Grant Types tab. Make sure the “Authorization Code” grant type is enabled. Don’t forget to click the
Save Changesbutton when you’re done.

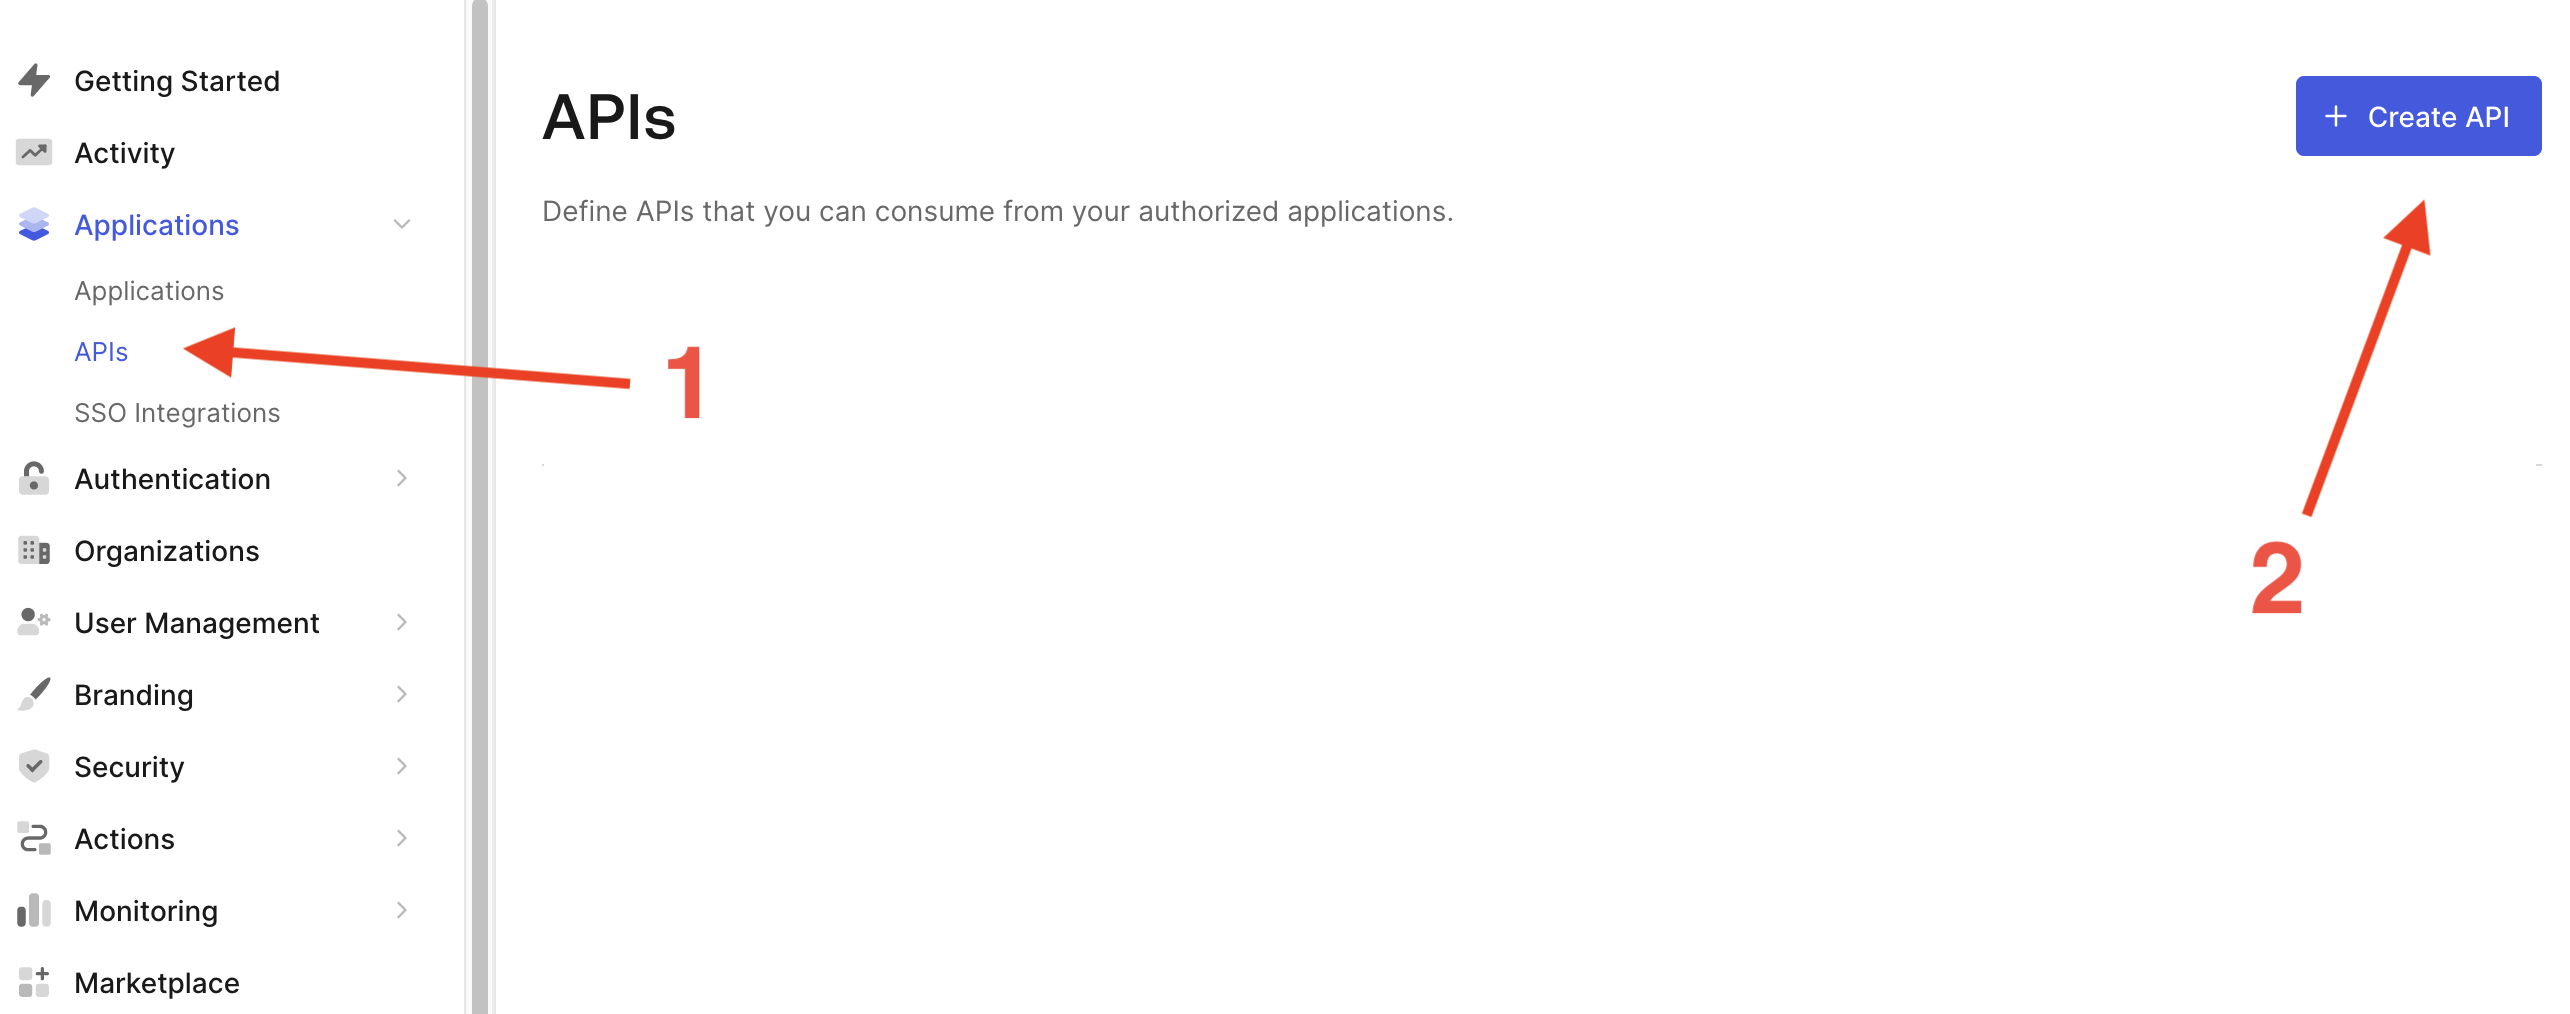
- Create a new API in Auth0. From the Applications menu on the left side of the dashboard, choose API. Then click the
Create APIbutton.
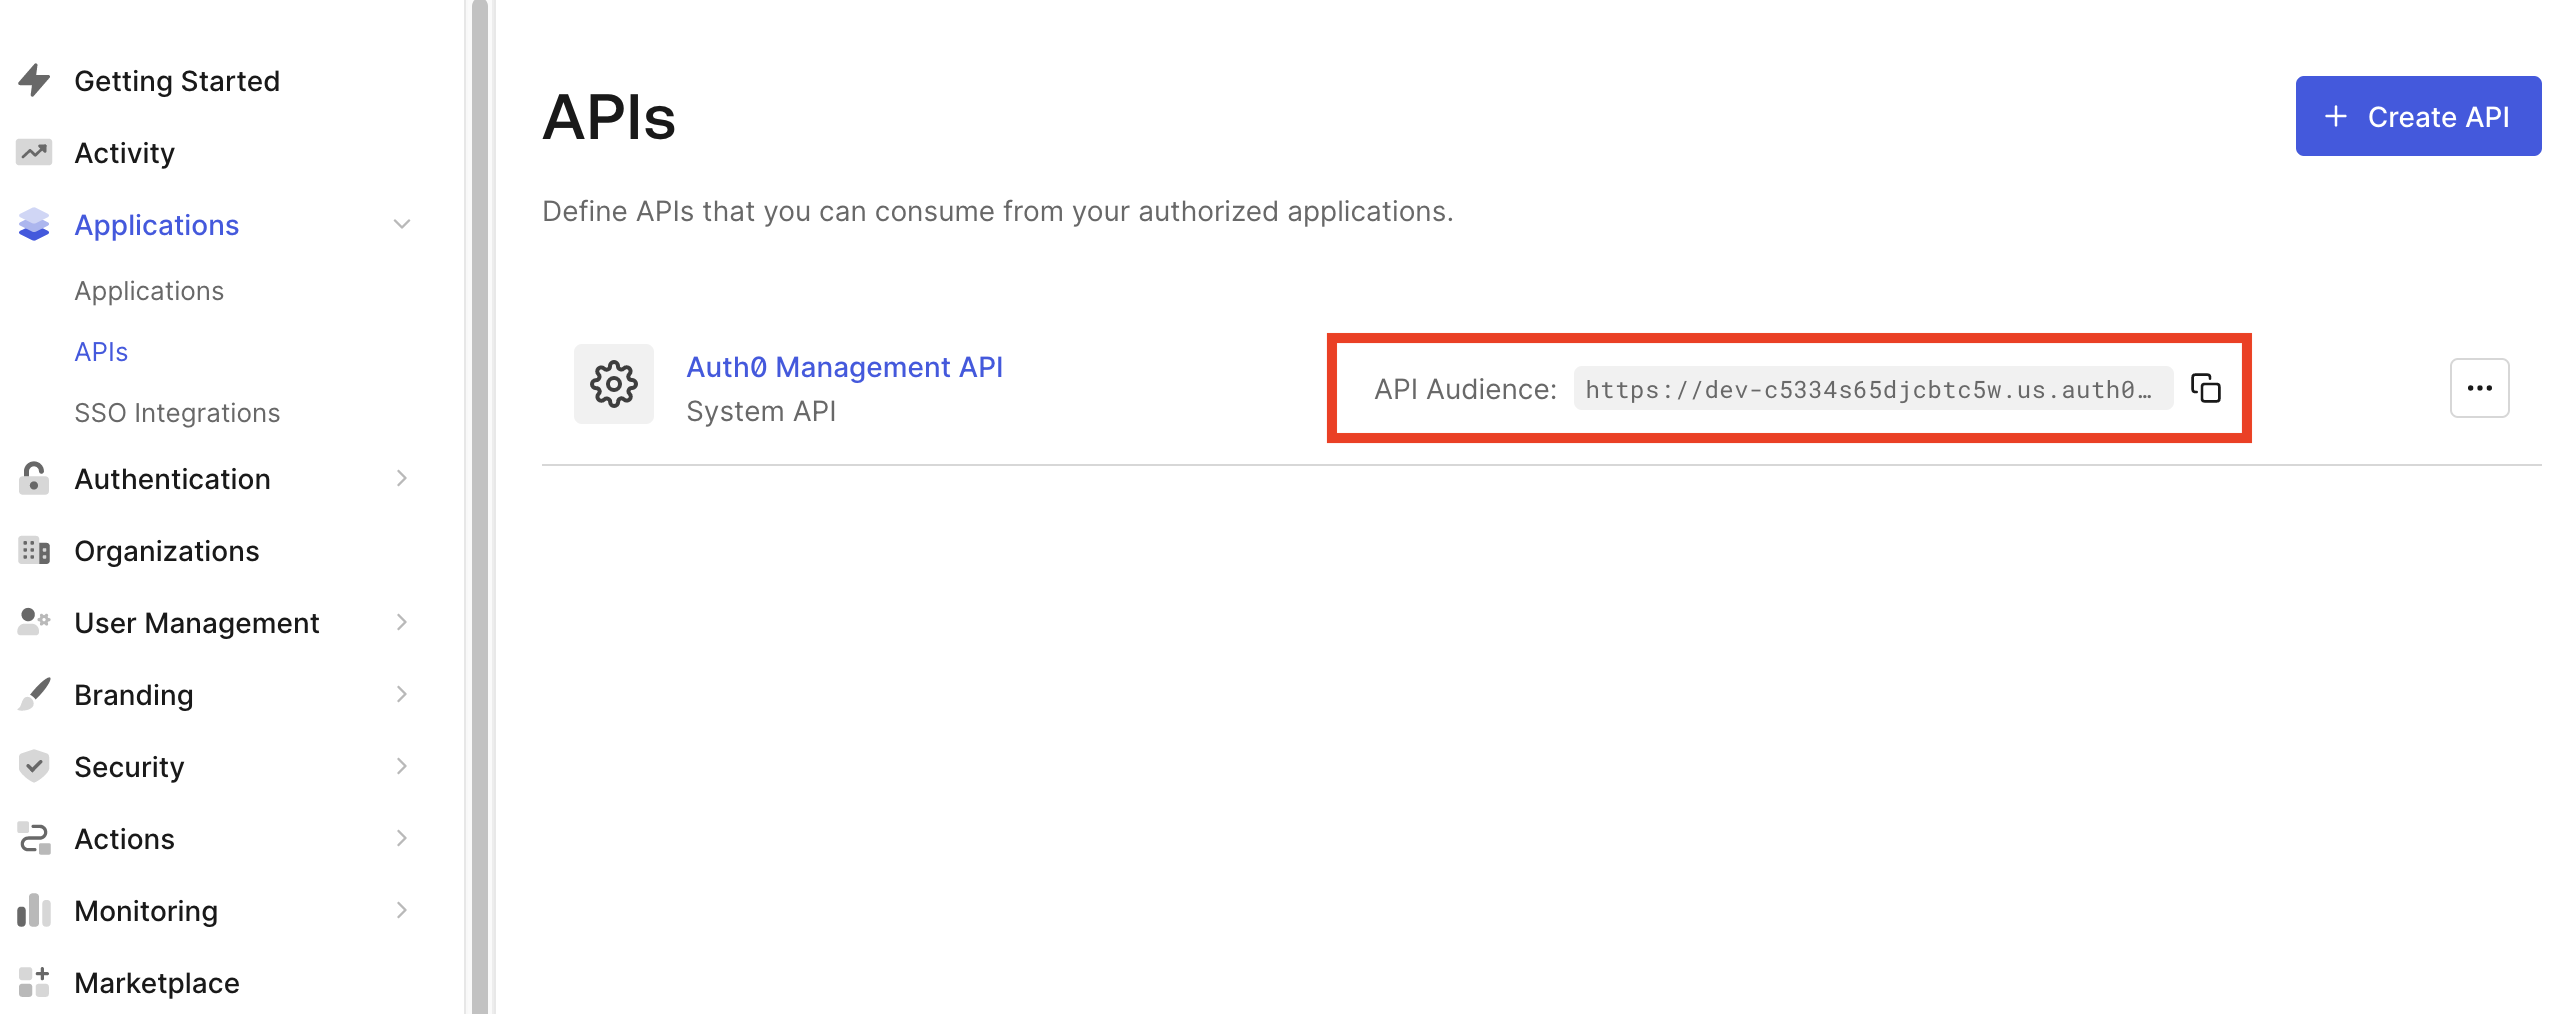
- Once your API is created, copy the API Audience (we will use it later when configuring Ditto).
Configure Ditto
Next we’ll return to the Ditto Portal to set up authentication for our Ditto app.
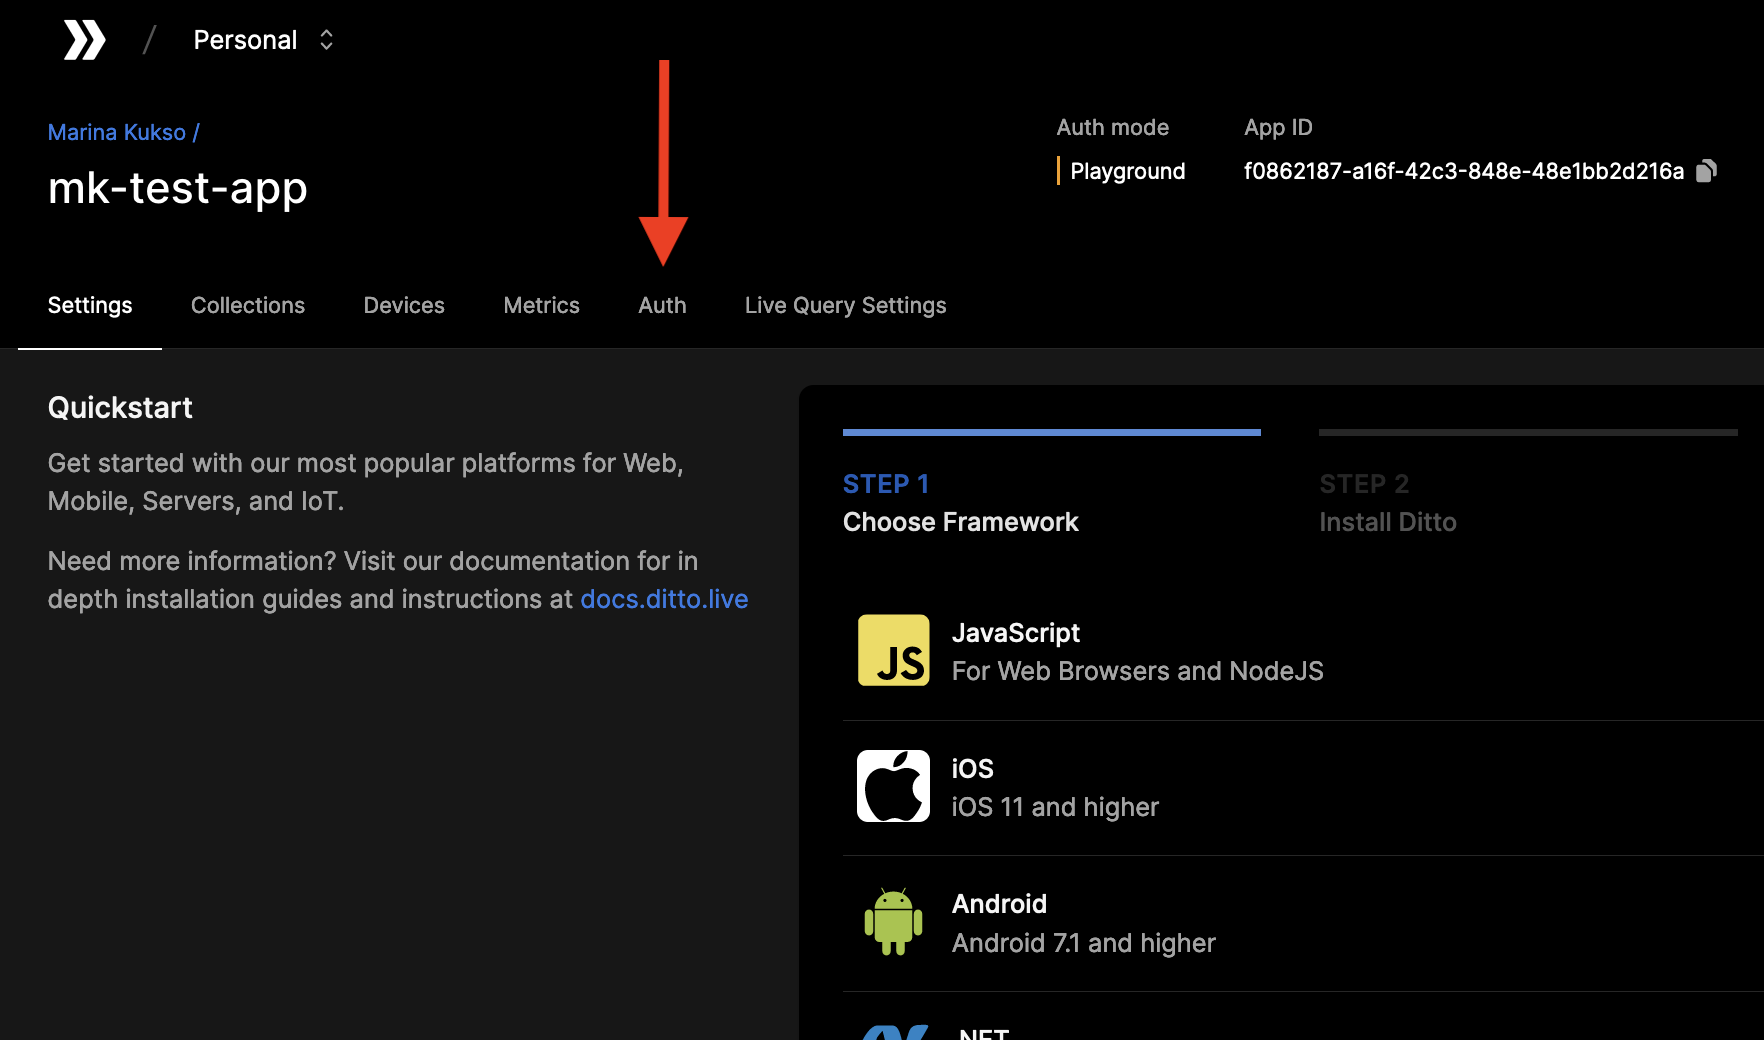
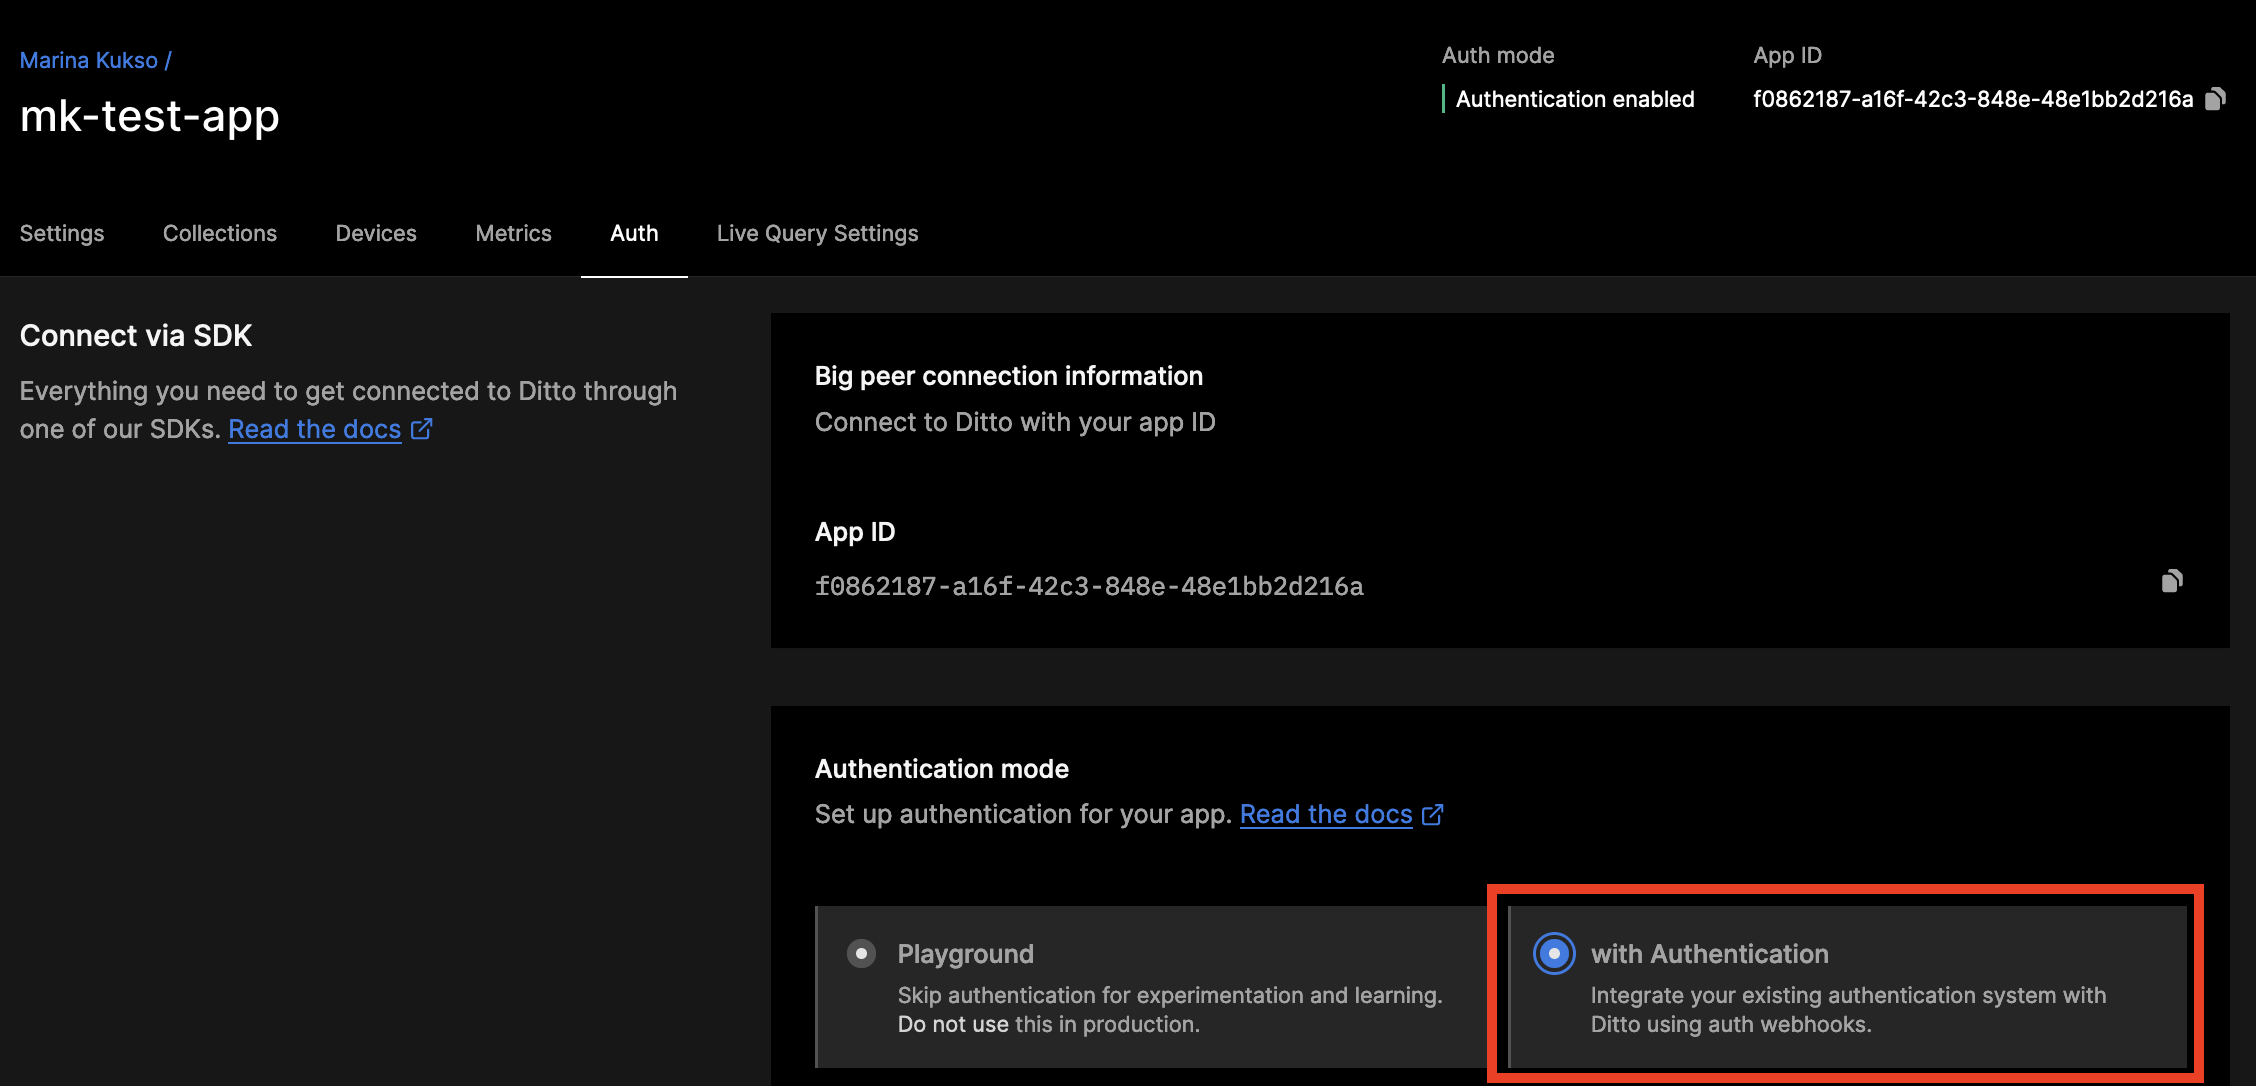
- Once you’ve signed in, click on your App to see detailed settings. Choose the Auth menu and select “With Authentication”.
- Below, a section called Authentication Webhooks will be editable. Once your Authentication Webhook Endpoint(s) is deployed and ready, you can register it in the portal. Add a Name and URL.
- Provide a unique Name to identify your authentication webhooks.
- The URL parameter is the fully qualified URL of the webhook that you deploy yourself. Please include https:// at the beginning of your URL.
For this tutorial, we will use our example webhook. This webhook is a server deployed on a third-party server and is just for testing. This server will always authorize all clients with full read and write permissions.
You can use this URL to test your application. However, you should not use this URL in production. This Replit simply authenticates everyone for 7 days of offline usage.
Once configured, you should see a webhook that looks like this in your portal app settings:

Next we’ll move to the code and begin integrating Auth0 with Ditto.
Integrating Auth0 with Ditto
Now that you’ve configured Auth0 and Ditto, you can start integrating them into your application.
Setting up Auth0 Scaffolding
In src/index.js, import the Auth0 React library and then wrap <App /> in <Auth0Provider>. Make sure to change domain, clientId, and audience to the values from the Auth0 dashboard.
The full code for this section is available at this commit.
src/index.js
 import { createRoot } from 'react-dom/client';
 import './index.css';
 import App from './App';
 import { init } from "@dittolive/ditto"
+import { Auth0Provider } from "@auth0/auth0-react"

 (async () => {
   await init()
   const root = createRoot(document.getElementById('root'));
   root.render(
-    <App />
+    <Auth0Provider
+      domain="YOUR_DOMAIN_HERE"
+      clientId="YOUR_CLIENT_ID_HERE"
+      redirectUri={window.location.origin}
+      audience="YOUR_AUDIENCE_HERE"
+      scope="read:current_user update:current_user_metadata"
+    >
+      <App />
+    </Auth0Provider>
   );
 })()
Next, we go to src/App.js and add a login button connected to Auth0. We’ll wire everything up later in the tutorial.
src/App.js
 import React, { useState, useEffect  } from "react";
 import './App.css';
 import Ditto from "./ditto"
+import { useAuth0 } from "@auth0/auth0-react"

 let ditto
 function App() {
+  const { user, loginWithRedirect, getAccessTokenSilently, isAuthenticated, logout } = useAuth0()
   const [cars, setCars] = useState(0)
   const [error, setError] = useState('')

 function App() {
   return (
     <div className="App">
       <header className="App-header">
+        {!isAuthenticated && <button onClick={() => loginWithRedirect()}>Log In</button>}
+        {isAuthenticated &&
+          <div>
+            <img src={user.picture} alt={user.name} />
+            <h2>{user.name}</h2>
+            <p>{user.email}</p>
+          </div>
+        }
         <div>
           <h3>
           {cars} cars
At this point, you can run npm run start.
The authentication handler should work if you click “Log In”. But a user can still do the “tasks” part of the site without authenticating. The next step is to make the Ditto part of the app work only after a user has authenticated.
Adding authentication to Ditto
Next we’ll add an authentication handler to src/ditto.js. In the identity block, replace the Ditto token line with an AuthHandler object that includes authentication-related functions. These functions take a token argument which gets passed in, so add token as an argument when defining the top-level get function.
Please note: this new token argument is not the same thing as the Ditto token that we had here before. This is an Auth0 Access Token and will be passed in from src/ditto.js with code that we’re going to implement later.
The full code for this section is available at this commit.
src/ditto.js
import { Ditto } from '@dittolive/ditto'

 let ditto
-export default function get() {
+export default function get(token) {
   if (!ditto) {
+    const authHandler = {
+      authenticationRequired: async function (authenticator) {
+        authenticator.loginWithToken(token, 'replit-auth')
+      },
+      authenticationExpiringSoon: function (authenticator, secondsRemaining) {
+        authenticator.loginWithToken(token, 'replit-auth')
+      },
+    }
     const identity = {
       type: 'onlineWithAuthentication',
       appID: 'YOUR_DITTO_APP_ID_HERE',
-      token: 'YOUR_DITTO_TOKEN_HERE'
+      authHandler: authHandler
     }
     ditto = new Ditto(identity, '/ditto')
     ditto.startSync()
   }
	 return ditto
 }
Next we modify src/App.js. The main change here is to change the startDitto() function to refreshToken() so that all Ditto activity happens once a user has authenticated.
src/App.js
 import React, { useState, useEffect  } from "react";
 import './App.css';
 import Ditto from "./ditto"
 import { useAuth0 } from "@auth0/auth0-react"

+const domain = "YOUR_AUTH0_DOMAIN_HERE";
+
 let ditto
 function App() {
   const { user, loginWithRedirect, getAccessTokenSilently, isAuthenticated, logout } = useAuth0()
   const [cars, setCars] = useState(0)
   const [error, setError] = useState('')

   useEffect(() => {
     let liveQuery
-    async function startDitto() {
-      ditto = Ditto()
-      liveQuery = ditto.store
-        .collection('cars')
+    async function refreshToken () {
+      const accessToken = await getAccessTokenSilently({
+        audience: `https://${domain}/api/v2/`,
+        scope: "read:current_user",
+      });
+
+      ditto = Ditto(accessToken)
+      liveQuery = ditto.store.collection('cars')
         .findAll()
         .observeLocal((tickets) => {
           setCars(tickets.length)
         })
     }
-    startDitto()
+
+    if (user) {
+      refreshToken()
+    }
     return () => {
       liveQuery?.stop()
     }
-  }, []);
+  }, [user, getAccessTokenSilently]);

   function onAddClick (){
-    if (!ditto) return setError('No Ditto.')
+    if (!ditto || !user) return setError('You must log in first.')
     setError('')
     ditto.store.collection('cars').upsert({
       "name": 'Toyota'
     })
   }
After you’ve made these changes and done npm run start, the “tasks” part of the site should only work after a user has authenticated.
Logging Out
The last step is to add a logout button that also clears the Ditto store. We recommend calling ditto.auth.logout with a callback function that evicts any data from the local Ditto store.
The full code for this section is available at this commit.
src/App.js
 function onAddClick (){
     if (!ditto || !user) return setError('You must log in first.')
     setError('')
     ditto.store.collection('cars').upsert({
       "name": 'Toyota'
     })
   }

+  function onLogoutClick() {
+    ditto.auth.logout(() => {
+      ditto.store.collection('cars').findAll().evict()
+    })
+    logout({ returnTo: window.location.origin })
+  }
+
   return (
     <div className="App">
       <header className="App-header">
         {!isAuthenticated && <button onClick={() => loginWithRedirect()}>Log In</button>}
         {isAuthenticated &&
           <div>
             <img src={user.picture} alt={user.name} />
             <h2>{user.name}</h2>
             <p>{user.email}</p>
+
+            <button onClick={onLogoutClick}>
+              Log Out
+            </button>
+
           </div>
         }