

Note: If you're interested the iOS version of this tutorial check out Running a React Web App in an iOS App.
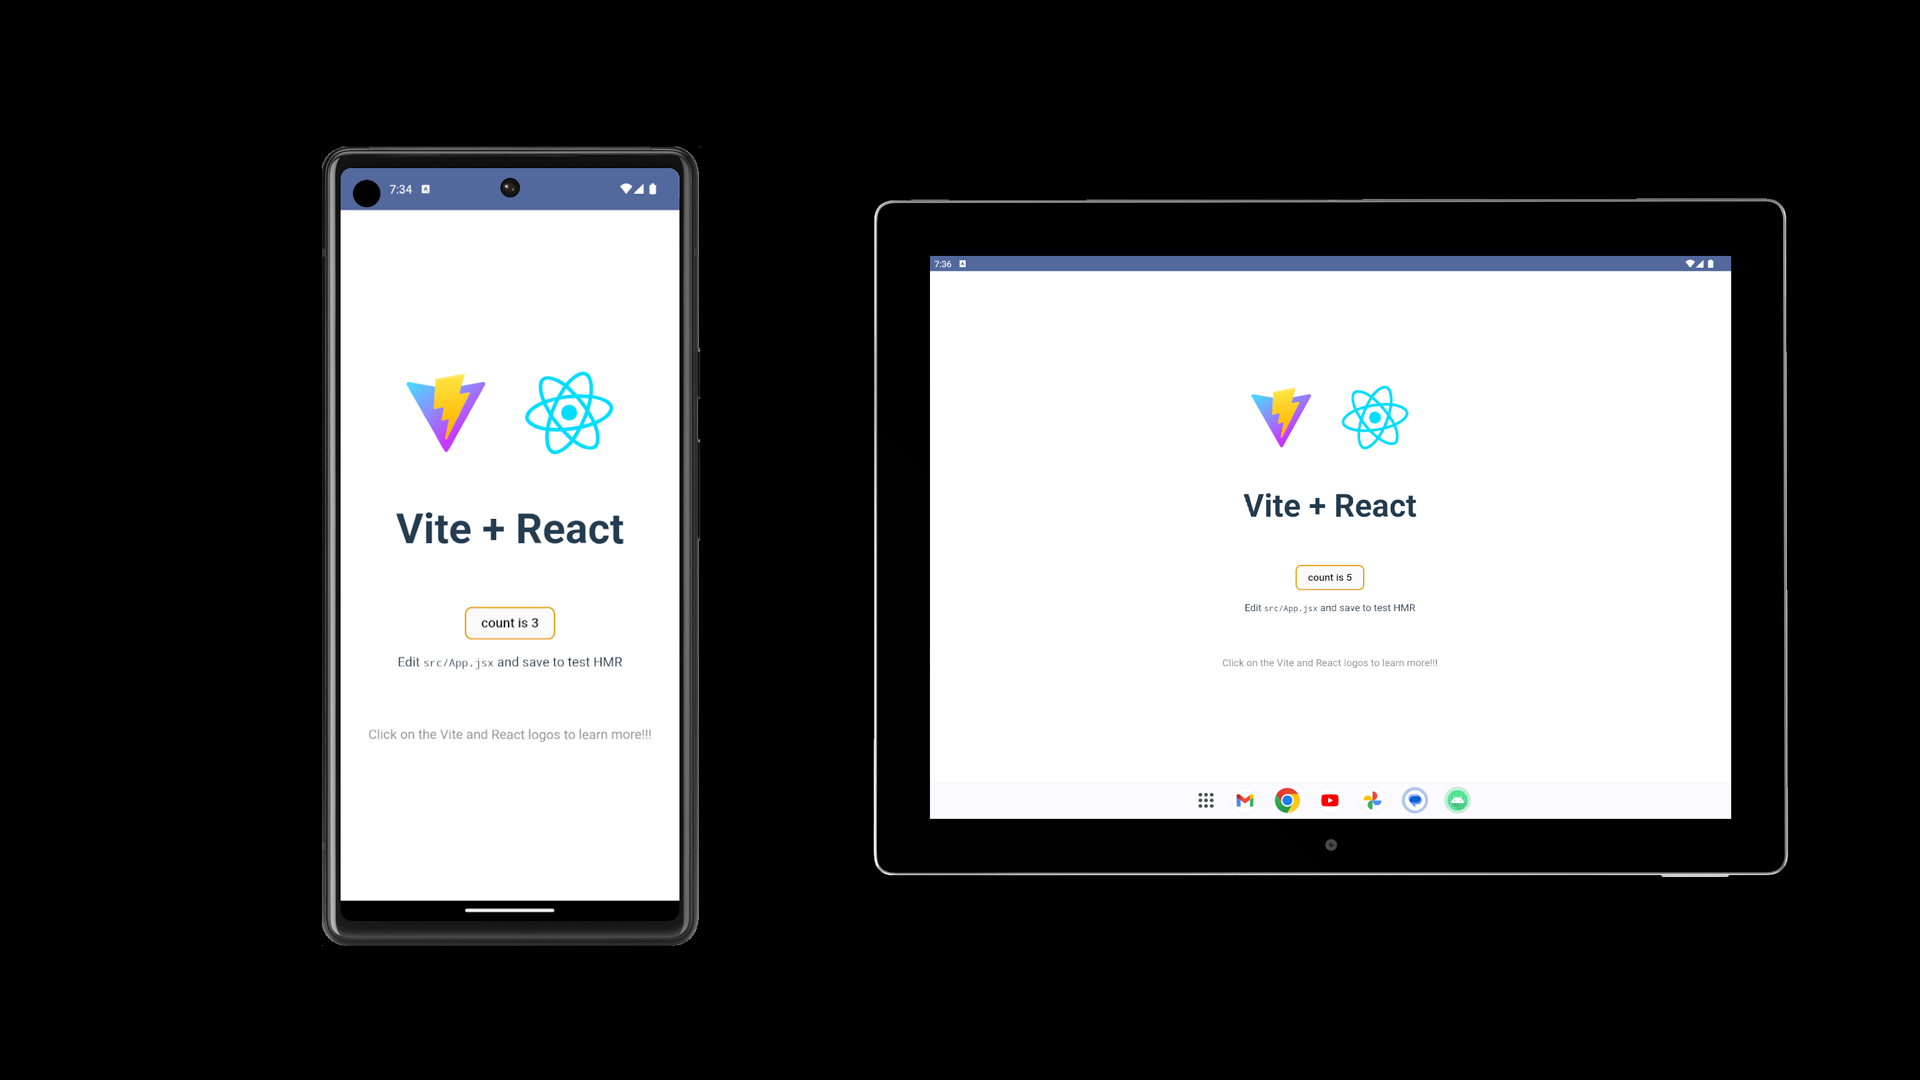
There are times where you need to run your React web app from a mobile phone locally. That means running it completely without the cloud, 100% offline-first, and absolutely zero remote server calls. This tutorial will show you how you can bundle your Vite and React app into an Android app and load it in a WebView. This is what we'll be building:
If you just interested in the final result, you can find the source code for this tutorial on GitHub.
Prerequisites
- Android Studio installed ("Hedgehog" (2023.1.1) or newer)
- Node.js installed (recommend version 20+)
- We recommend using nvm if you are on macOS or Linux
- If you're on Windows, we recommend using nvm-windows
1. Setup your directory structure
For this project you'll need a good directory structure to setup both your web and Android project.
mkdir react-in-mobile
2. Create a React App with Vite
For this tutorial, we will use the very popular Vite tooling to generate our React app. Vite is a very fast, very convenient toolbox for building web applications in React, Vue, Svelte, Vanilla JS and more. It comes with an amazing build system and development hot-module-reloading (also known as HMR) features. For this tutorial, you don't have to use React! You can use other frameworks like Vue or Svelte. Vite supports them all!
2a. Generate Template Project
cd react-in-mobile
npm init vite@latest web -- --template react
This will create a new directory called web with a React app inside of it. For this tutorial, we're not going to change too much from the boilerplate React app. At this point you will need to install the dependencies for the web app.
cd web
npm install
2b. Configure Base URL
Open the vite.config.js file in the web directory that was created. Add the base configuration as shown below.
export default defineConfig({
  plugins: [react()],
  base: "./",
})
2c. Build and run Vite
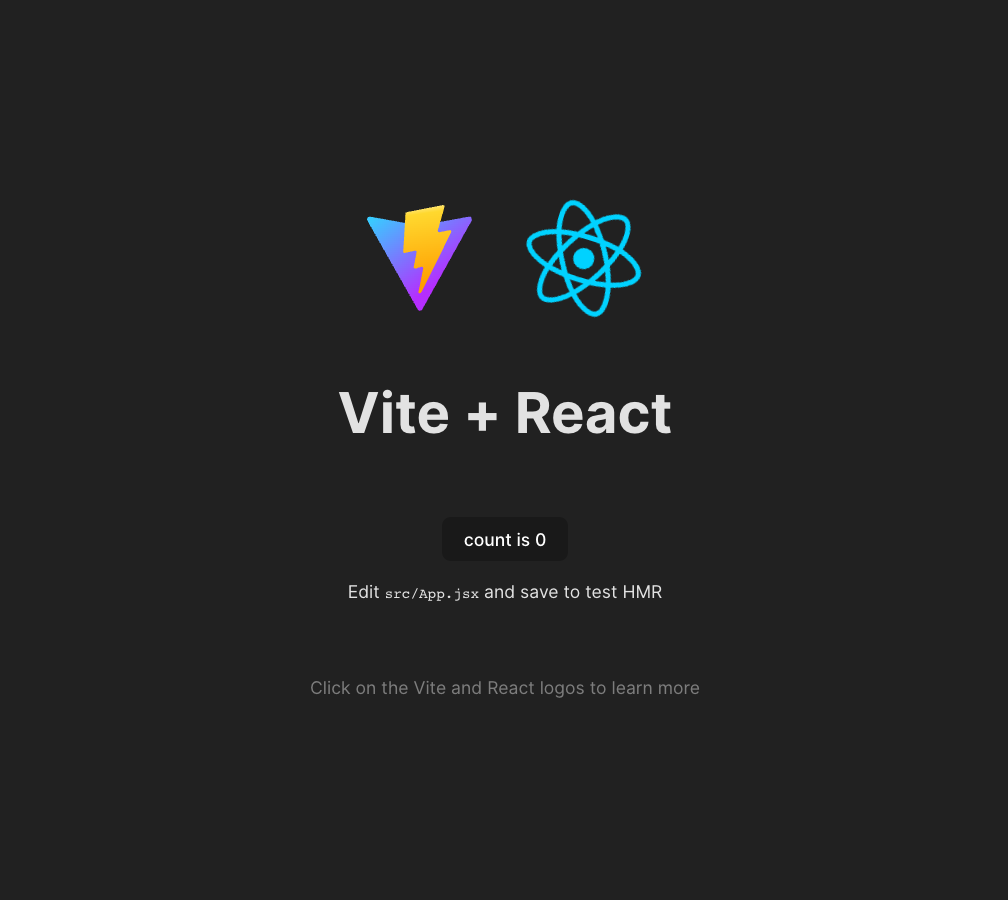
You can run the app by running npm run dev inside of the web directory. In your terminal, Vite should print out a URL that you can open in your browser to see the app running. Open the URL and the page should look something like this.
3. Create an Android App with Jetpack Compose
Now that we have our web app, we need to create an Android app to run it in. For this tutorial, we will use Jetpack Compose to build our Android app. Jetpack Compose is a modern UI toolkit for building Android apps. It's a declarative UI framework that allows you to build your UI with Kotlin. It's very similar to React, Vue, and Svelte. If you're familiar with those frameworks, you'll feel right at home with Jetpack Compose.
Note that you need to have Android Studio "Hedgehog" (2023.1.1) to follow along. Older versions of Android Studio do not include Compose in the project templates.
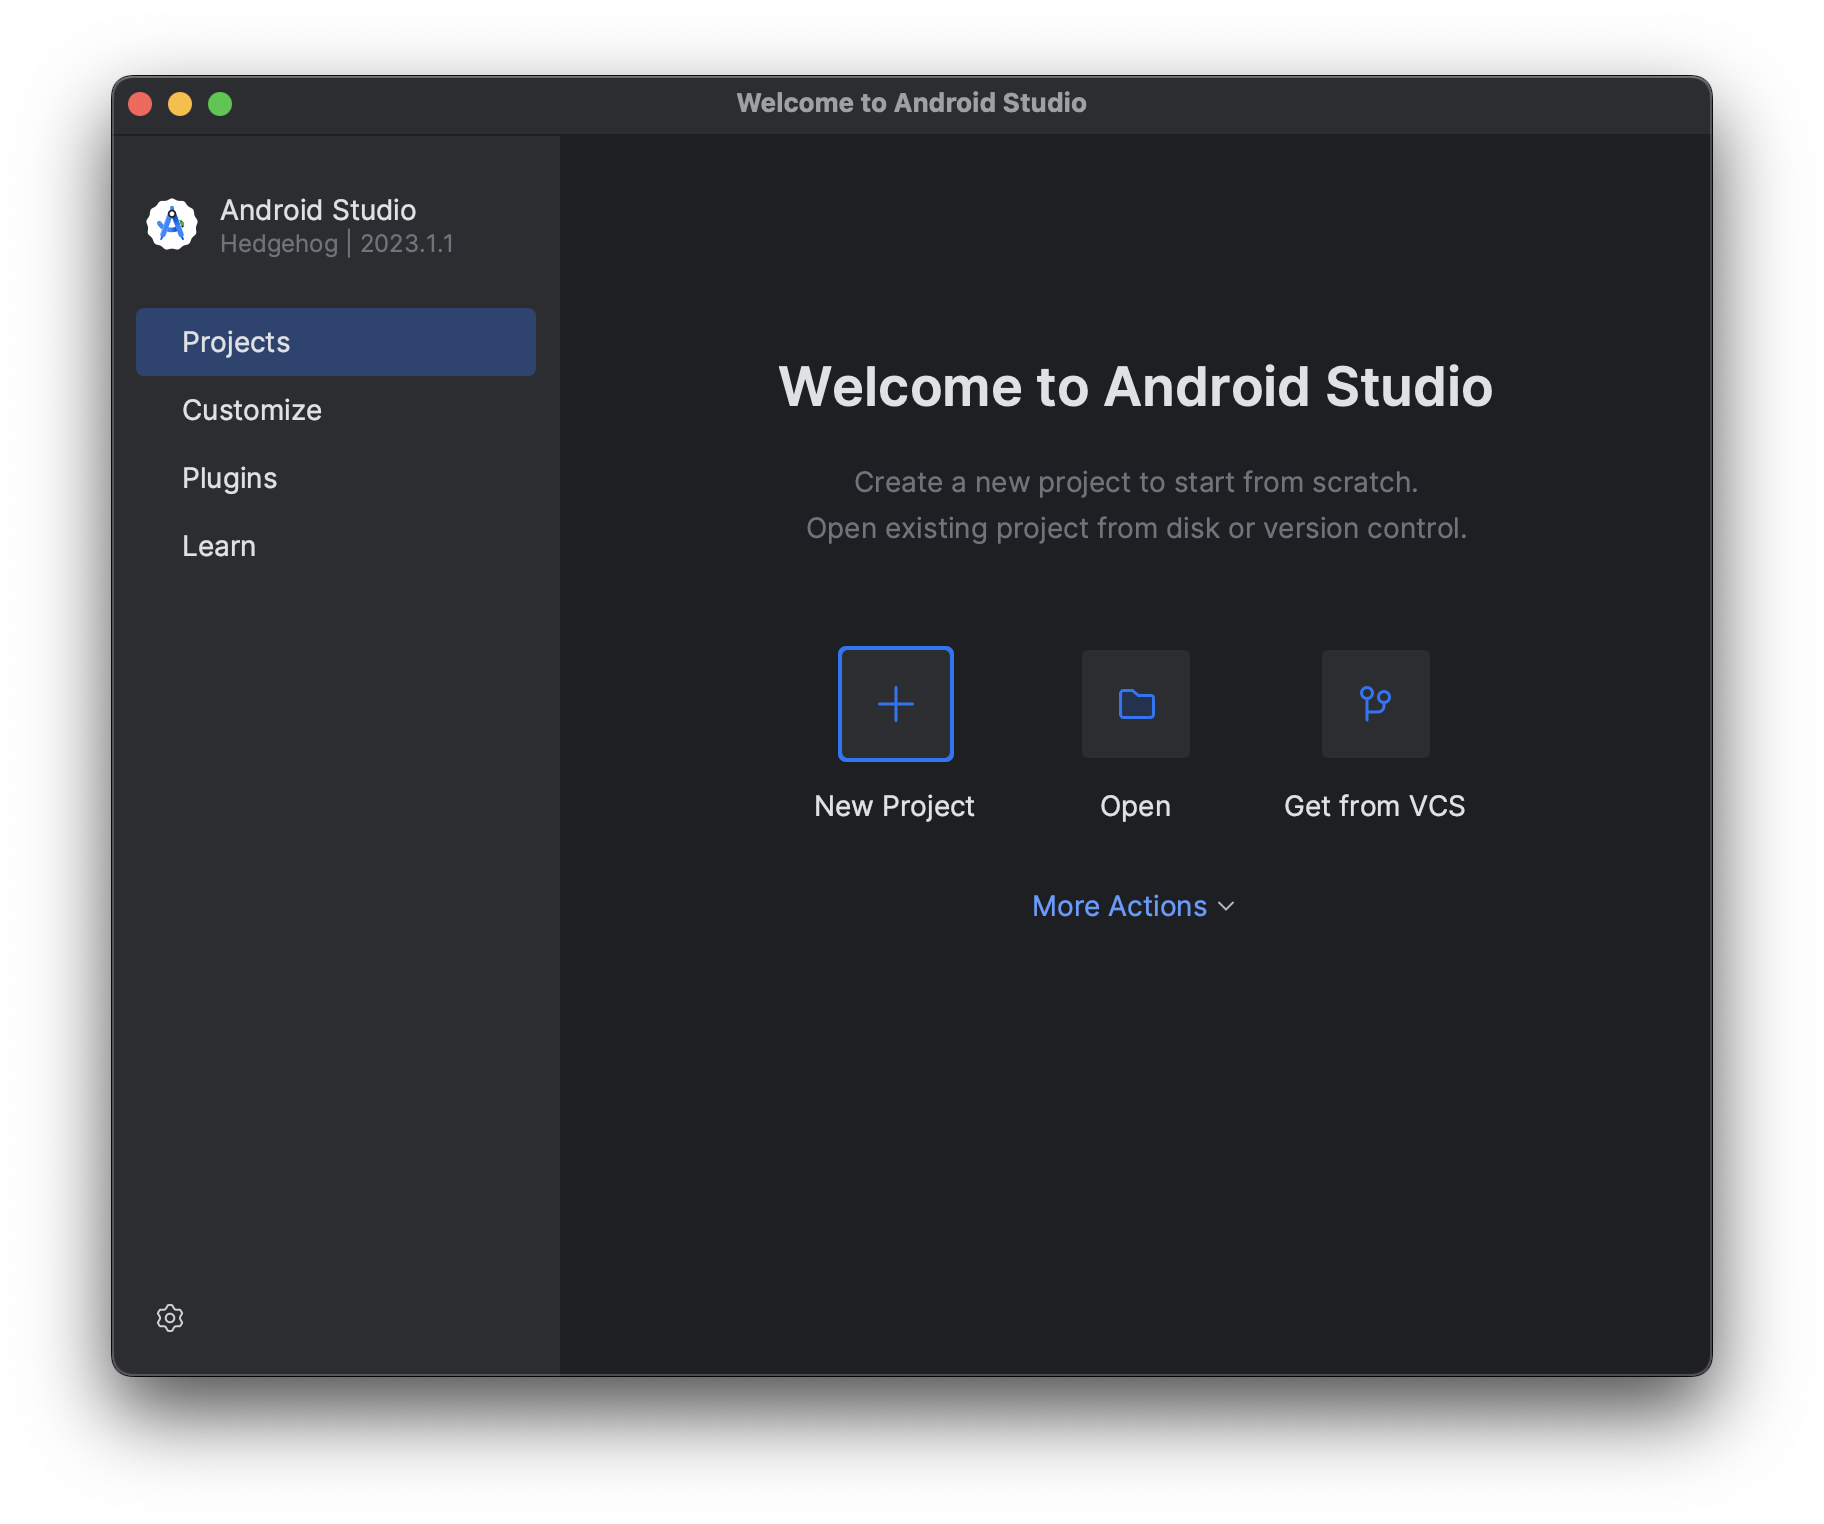
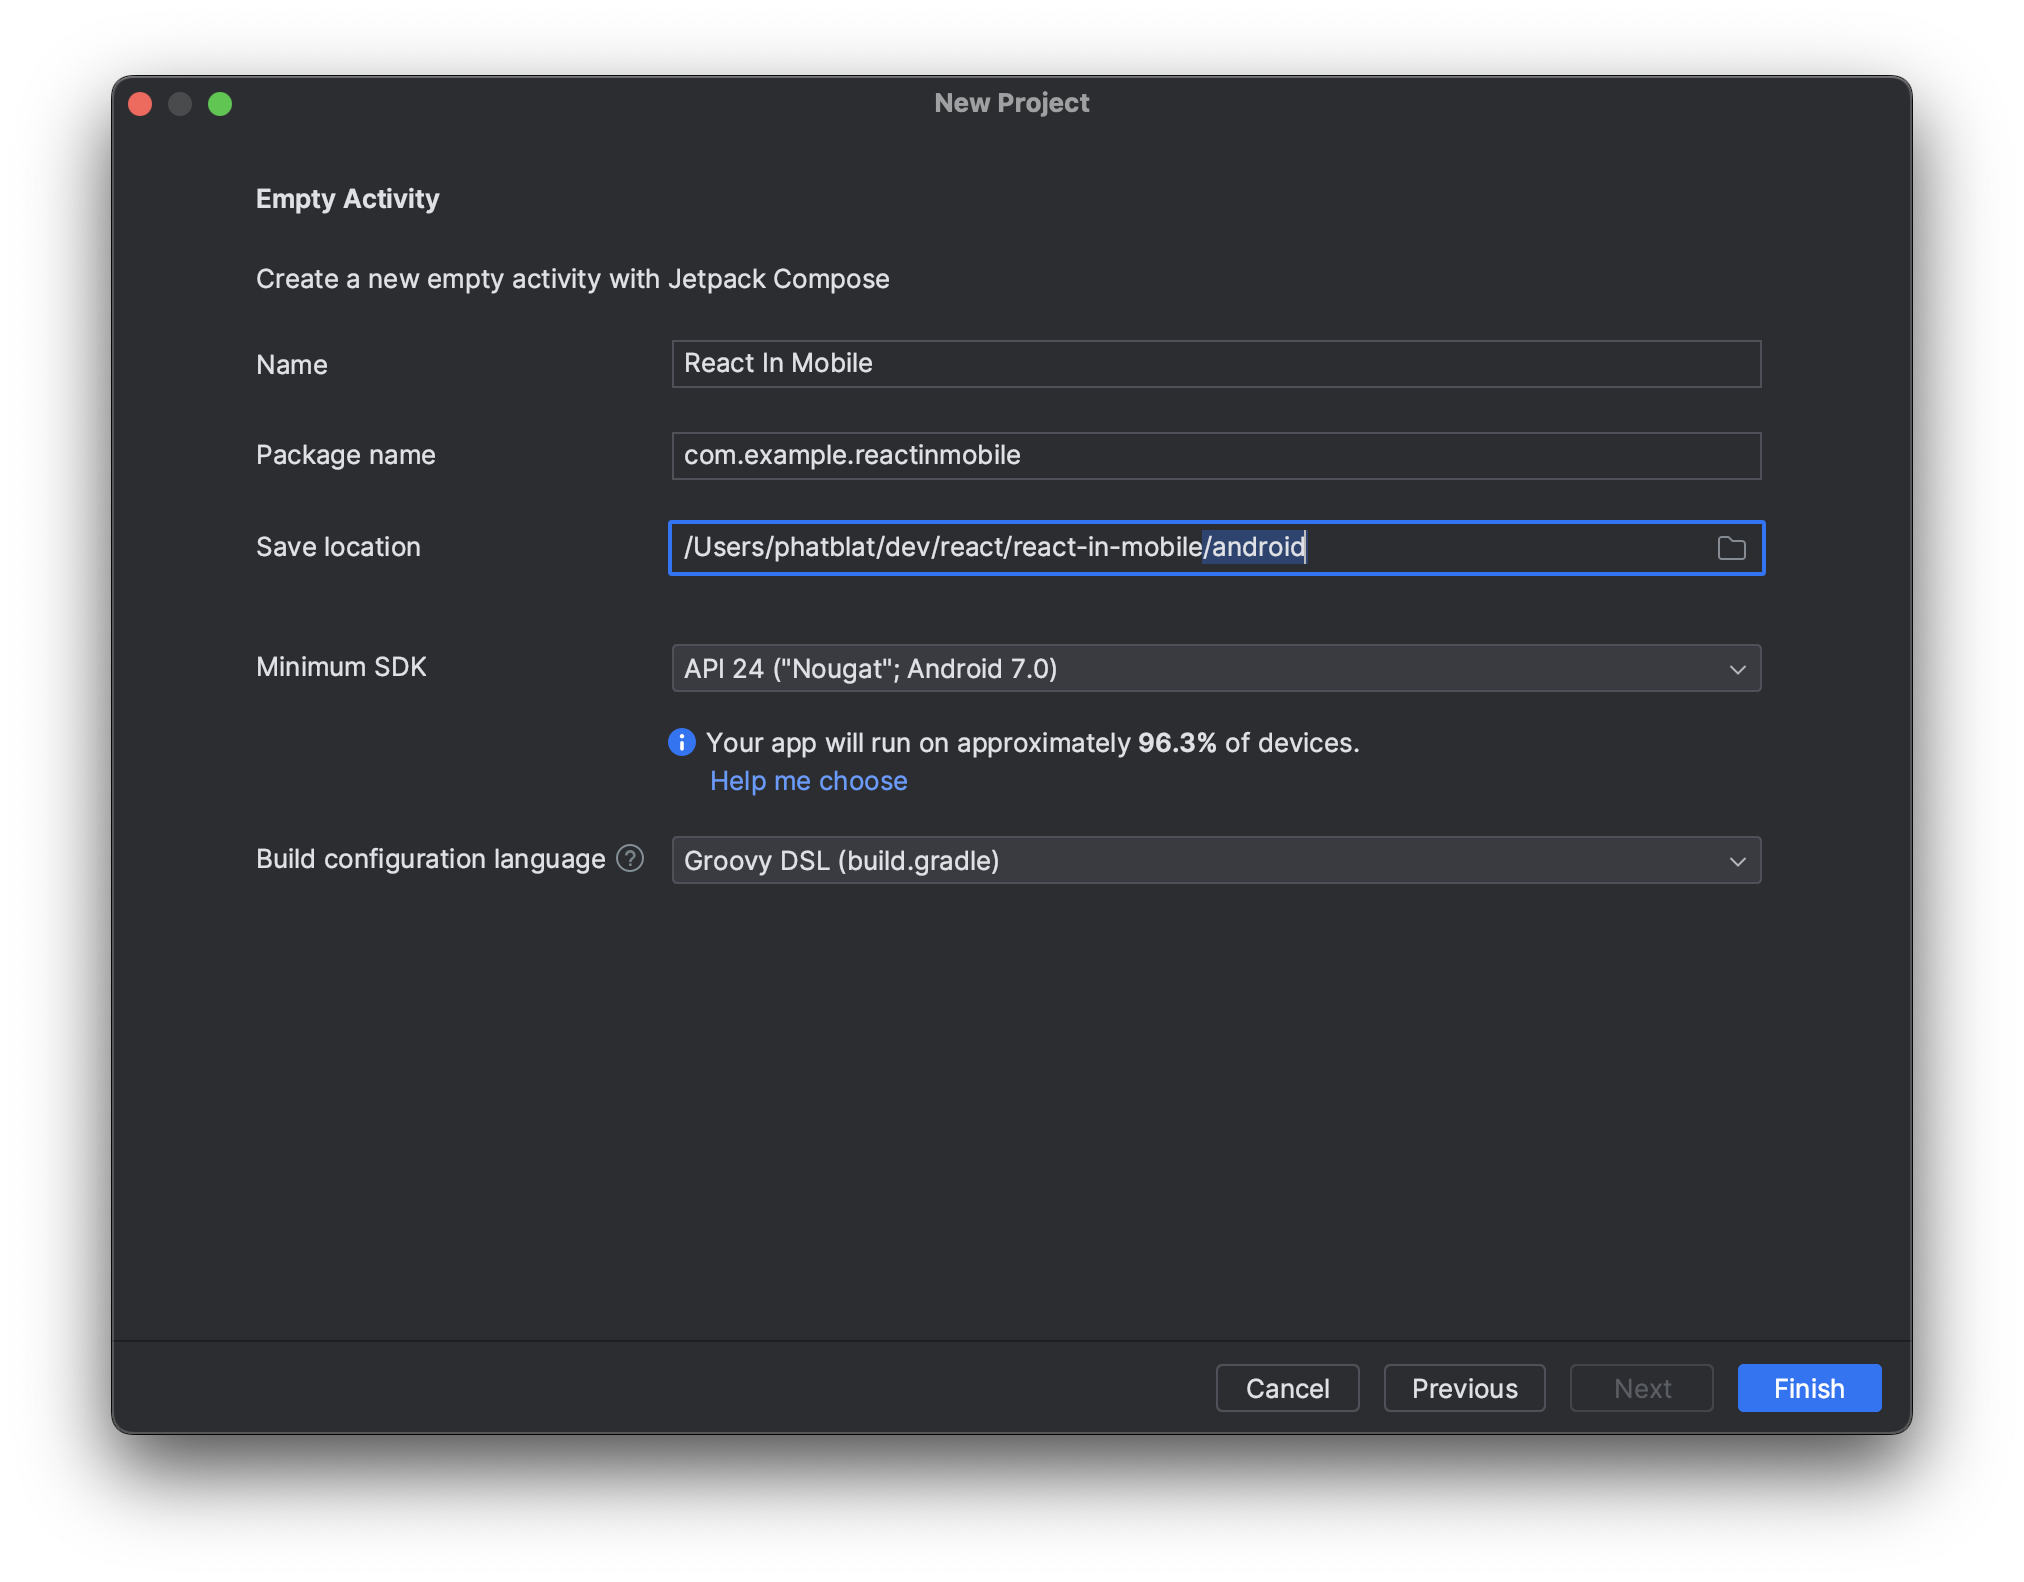
Open Android Studio and click the "New Project" button on the Welcome screen.
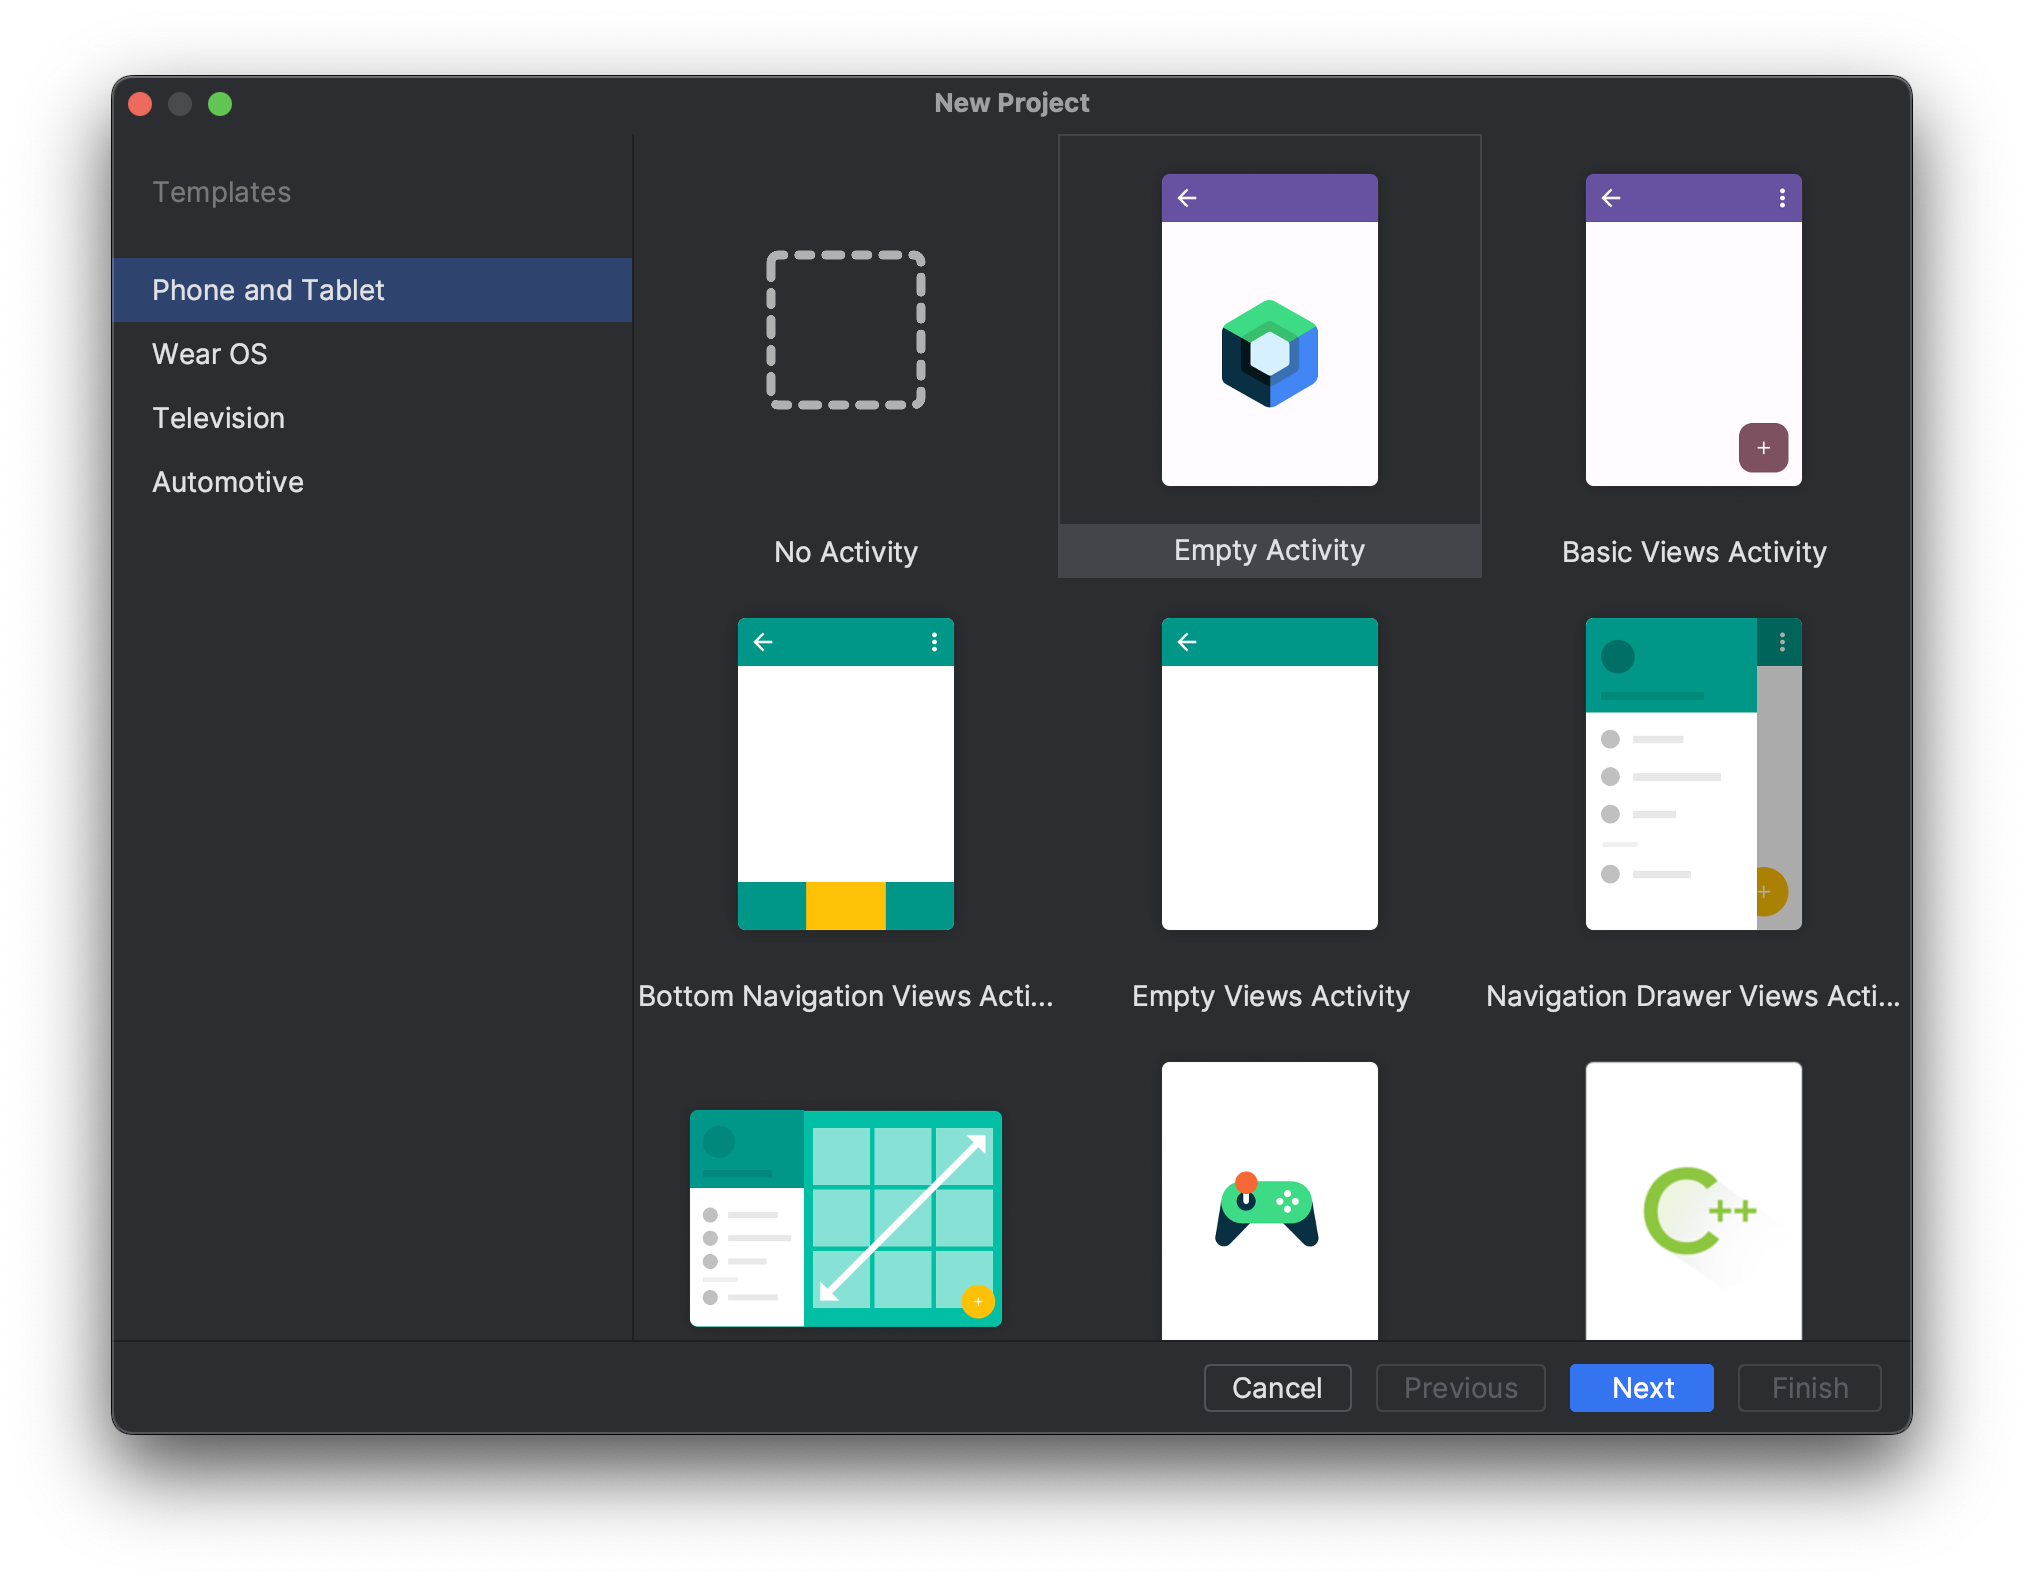
Select the "Empty Activity" template and click "Next".
Review the fields of the "New Project" dialog and edit them as noted below.
- Enter a name for your app. For this tutorial, we'll use "React in Mobile".
- In the "Save location" field, click the 🗂️ button on the right and select the
react-in-mobiledirectory you created earlier. - Append an
/androidfolder at the end of the path in the "Save location" field. - Click the drop-down next to "Build configuration language" and select "Groovy DSL"
- Click "Finish".
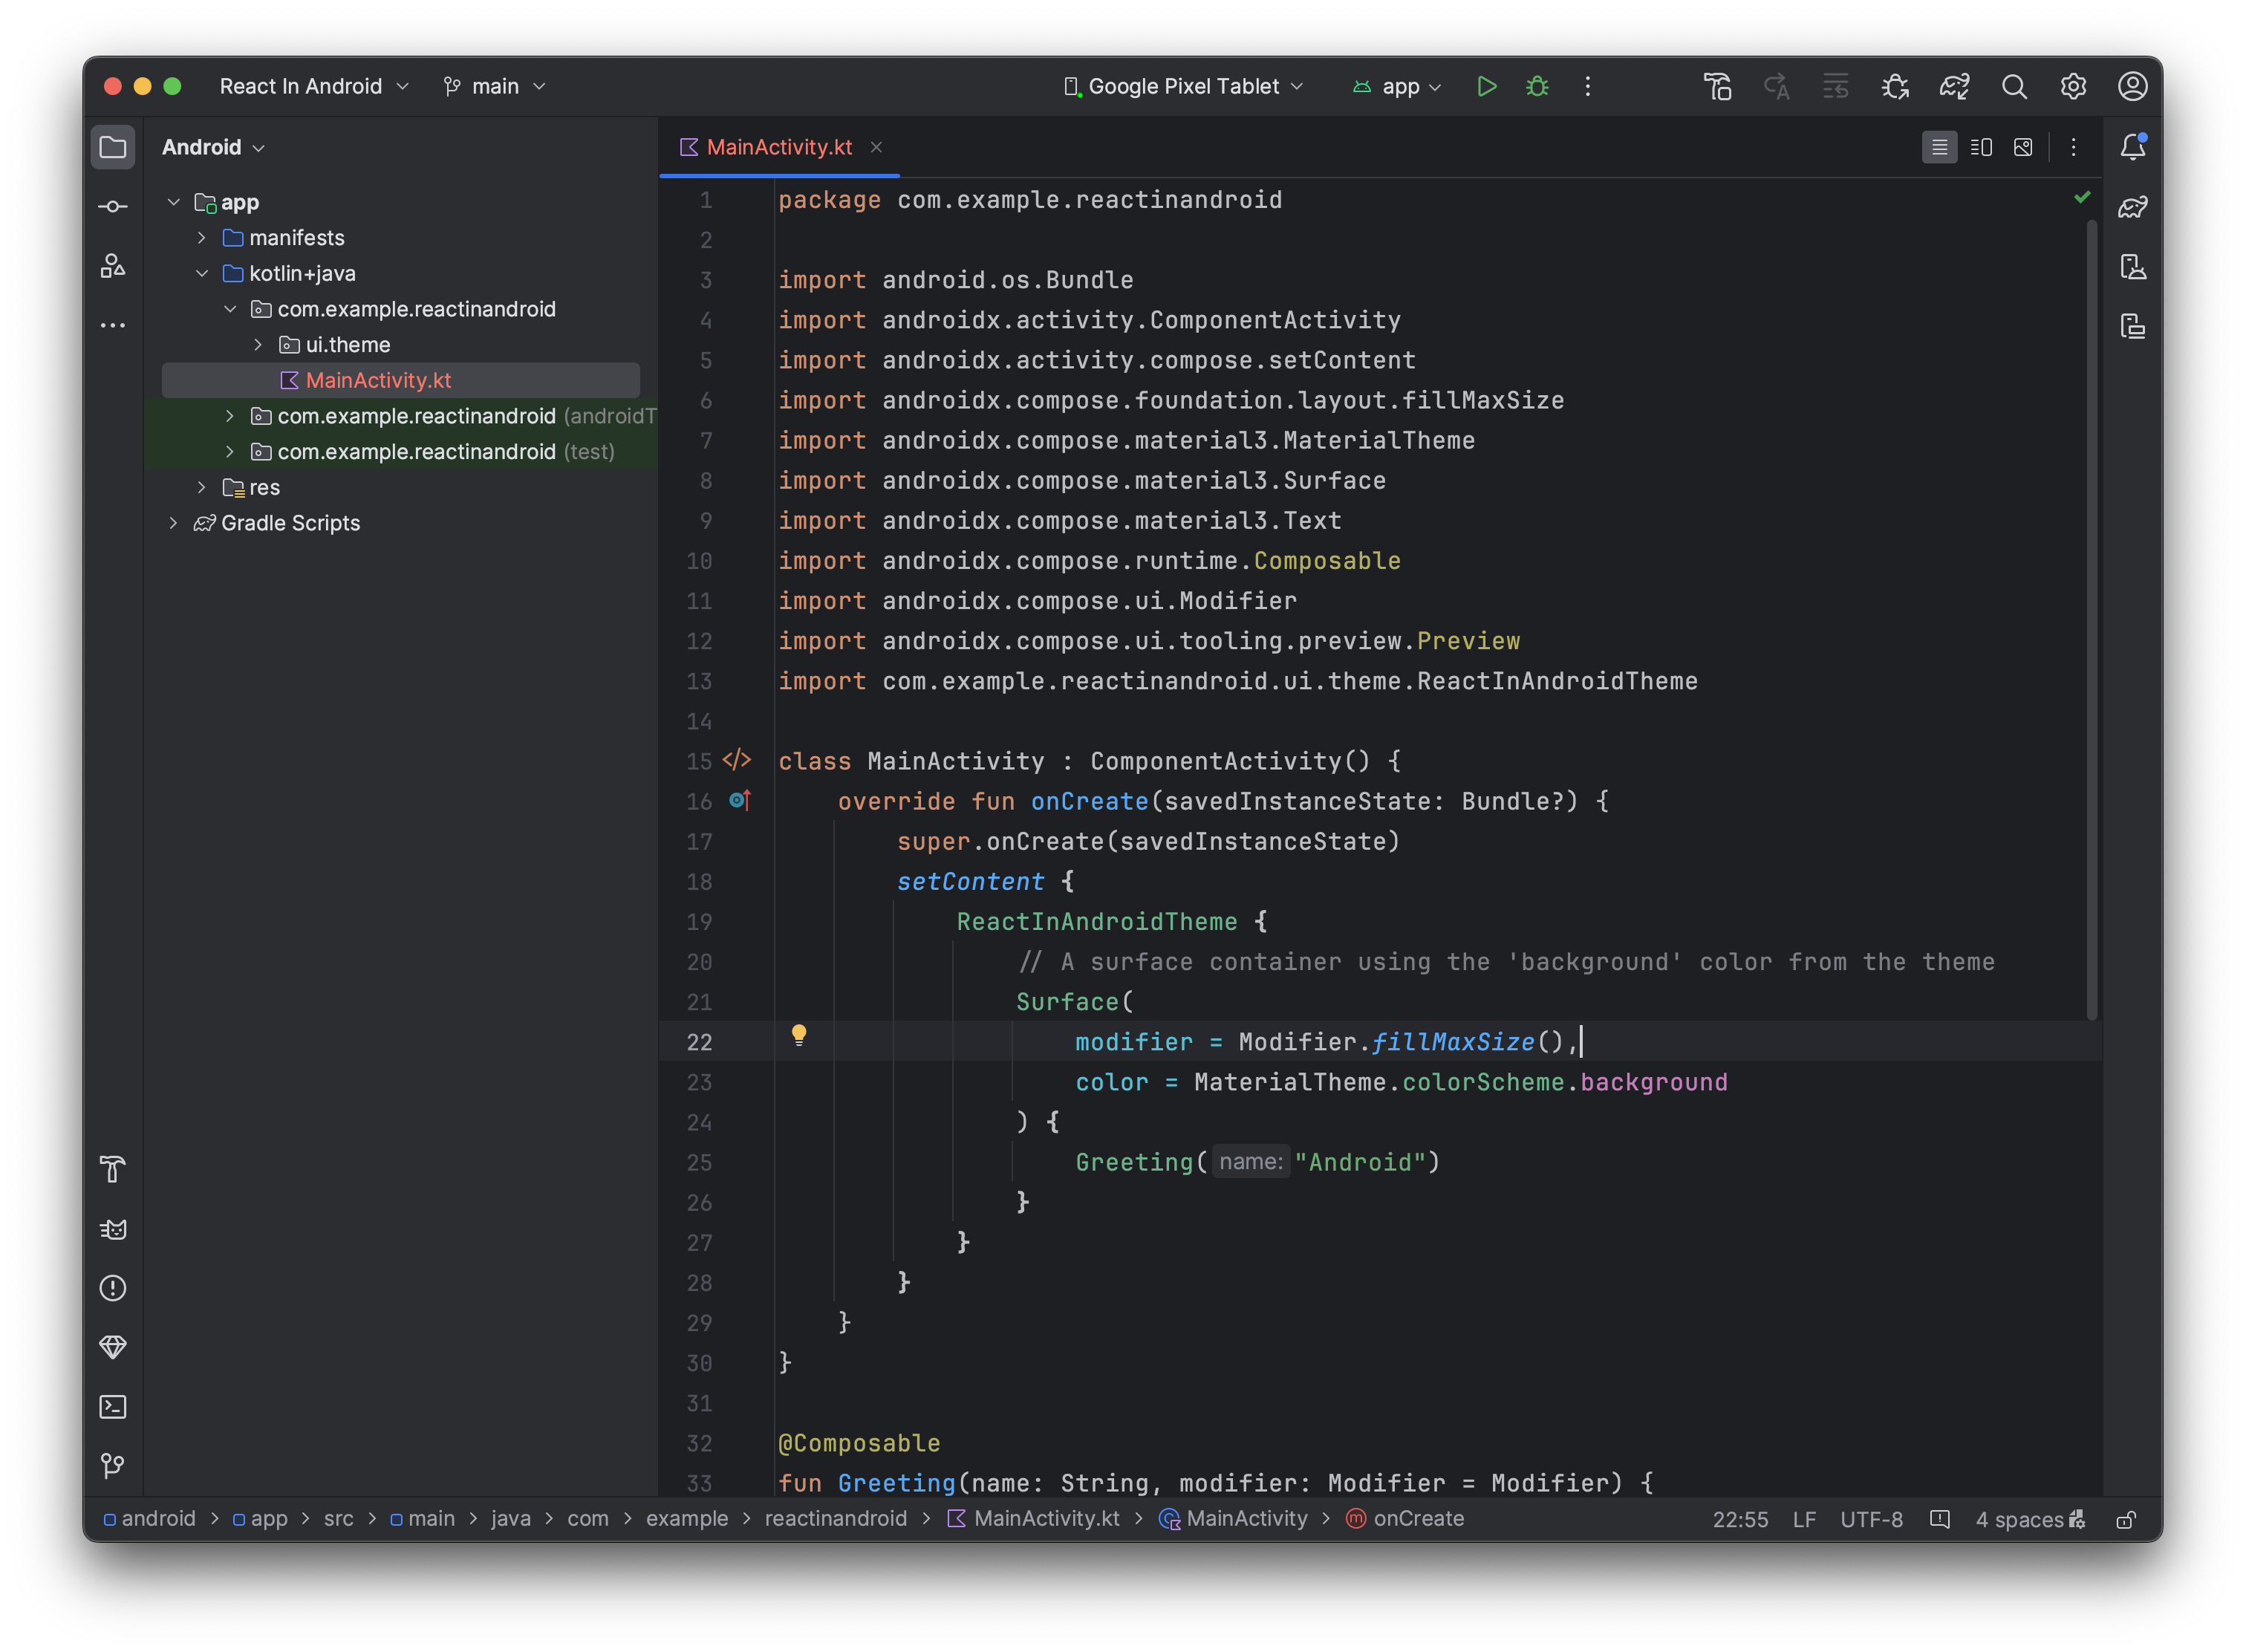
Android Studio will take some time to sync the project. The MainActivity.kt file will open automatically. This is the entry point for your app. You can run the app by clicking the green play button in the top right corner of Android Studio. You should see a blank screen with the text "Hello World!".
At the bottom of MainActivity.kt, you'll see a @Composable function named Greeting. This is some simple Jetpack Compose UI. We'll change this later.
Note: If you're not familiar with Jetpack Compose, you can checkout this tutorial to learn more.
4. Configure Gradle to Build the Web App
Now we will configure the gradle build system to build the web app and copy it into the Android app's assets directory.
4a. Add the node-gradle plugin to the top-level build.gradle file
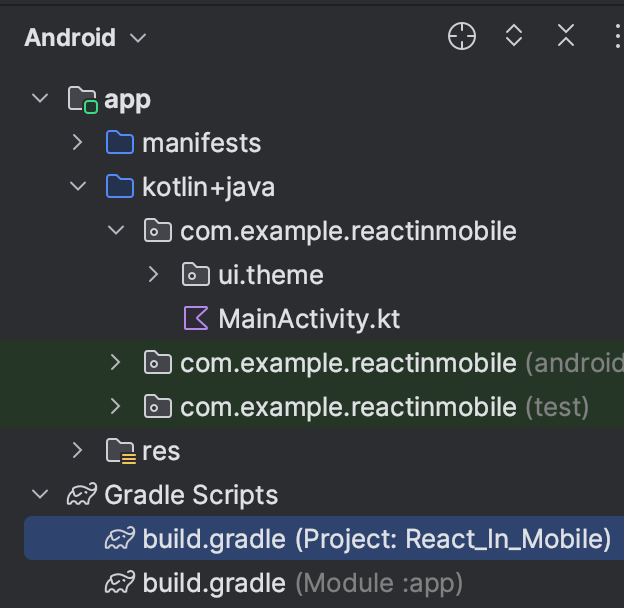
The left pane of Android Studio should be displaying the "Project" tool window showing the directory structure of your project. Expand the "Gradle Scripts" section of the directory tree and open the build.gradle file which has "(Project:" after the name.
This is the top-level Gradle build file for your project. Add the node-gradle plugin to the plugins section at the top of the file. It should look like this:
plugins {
    id 'com.android.application' version '8.2.0' apply false
    id 'org.jetbrains.kotlin.android' version '1.9.0' apply false
    /**
     * This plugin allows you to run npm commands from gradle.
     * It's used by the buildWeb gradle task in the :app module.
     */
    id "com.github.node-gradle.node" version "7.0.1" apply false
}
Save the file when you are done editing it.
4b. Apply the node-gradle plugin to the app module
Now open the other build.gradle file which has "(Module :app)" after the name. This is the build file for the app module. Add the node-gradle plugin to the plugins section at the top of the file. It should look like this:
plugins {
    id 'com.android.application'
    id 'org.jetbrains.kotlin.android'
    id 'com.github.node-gradle.node'
}
We will continue editing this file in the next two steps.
4c. Update Android SDK versions
Below the plugins block you will see the android block configurating the app. Check the compileSdk and targetSdk values. Both of these should be set to a value of 34. If you are using a version of Android Studio older than Hedgehog these values were likely primed with a lower version. SDK 34 is required for the version of WebKit being used.
4d. Add the webkit dependency to the app module. This will allow you to use the WebView component in your app
Scroll to the bottom of the app's build.gradle file and locate the dependencies block. Add the androidx.webkit:webkit dependency to the dependencies block. It should look like this:
dependencies {
  // You will need this to load local JS and CSS files in the WebView
  implementation 'androidx.webkit:webkit:1.9.0'

  //... other dependencies
}
4e. Now we'll add a few gradle tasks that will build the web app and copy it into the Android app's assets directory
Add the following to the bottom of your app module's build.gradle file:
/**
 * Node plugin configuration
 * https://github.com/node-gradle/gradle-node-plugin/blob/master/docs/usage.md#configuring-the-plugin
 */
node {
    // The Node.js project directory location
    // This is where the package.json file and node_modules directory are located
    nodeProjectDir.set(file("../../web"))
}

/**
 * This task builds the vite project at ../../web folder.
 */
def buildWeb = tasks.register('buildWeb', NpmTask) {
    description = 'Runs vite build'
    args = ['run', 'build']
    doFirst {
        println 'Executing `npm run build` in ../../web'
    }
    dependsOn npmInstall
}

/**
 * Removes the assets generated by the `buildWeb` task.
 */
def cleanWeb = tasks.register('cleanWeb', Delete) {
    description = 'Removes web assets generated by vite'
    delete '../../web/dist'
}

/**
 * This task cleans the Android assets folder.
 * This is necessary because the Android build process does not clean the assets folder.
 */
def cleanAssets = tasks.register('cleanAssets', Delete) {
    description = 'Removes web assets from app module'
    delete 'src/main/assets/dist'
}

/**
 * This task copies the the vite project at `../../web/dist` folder to the Android assets folder.
 */
def copyDistToAssets = tasks.register('copyDistToAssets', Copy) {
    description = 'Copies web assets into app module'
    from '../../web/dist'
    into 'src/main/assets/dist'
    dependsOn buildWeb
    dependsOn cleanAssets
}

/**
 * Hooks tasks into running as part of the app module build.
 */
tasks.named("preBuild") {
    dependsOn copyDistToAssets
}

/**
 * Includes tasks when running a project clean.
 */
tasks.named('clean') {
    dependsOn cleanWeb
    dependsOn cleanAssets
}
4f. Build the app in Android Studio. (Build > Make Project menu entry)
In the "Build Output" pane (View > Tool Windows > Build menu entry) that appears at the bottom, you should see the web app being built and copied into the Android app's assets directory. The logs for the :app:buildWeb gradle task will be near the start of the build logs; searching for buildweb is the easiest way to find them. The logs should contain something like this:
> Task :app:buildWeb
Executing `npm run build` in ../../web

> web@0.0.0 build
> vite build

vite v4.5.1 building for production...
transforming...
✓ 34 modules transformed.
rendering chunks...
computing gzip size...
dist/index.html                   0.45 kB │ gzip:  0.29 kB
dist/assets/react-35ef61ed.svg    4.13 kB │ gzip:  2.05 kB
dist/assets/index-d526a0c5.css    1.42 kB │ gzip:  0.73 kB
dist/assets/index-e92ae01e.js   143.41 kB │ gzip: 46.13 kB
✓ built in 406ms
Now our project directory structure should look like this:
react-in-mobile
├── android
│   └── app
│       ├── build.gradle
│       └── src
│           └── main
│               ├── assets
│               │   └── dist
│               │       ├── assets
│               │       │   ├── index-d526a0c5.css
│               │       │   ├── index-e92ae01e.js
│               │       │   └── react-35ef61ed.svg
│               │       ├── index.html
│               │       └── vite.svg
│               └── src
│                   └── main/java/com/example/reactinmobile
│                       └── MainActivity.kt
└── web
    ├── dist
    │   ├── assets
    │   ├── index.html
    │   └── vite.svg
5. Create a Jetpack Compose view wrapping Android's WebView
Note that WebView doesn't have a Jetpack Compose counterpart. So we will need to create a Compose wrapper for it. If you'd like to learn more about how to create a Jetpack Compose wrapper, check out this tutorial.
5a. Create a ComposeWrappedWebView.kt file
Back in the Android Studio project pane on the left, expand the app module folder, expand the kotlin+java folder under it and right-click on the *.reactinmobile package folder that contains your MainActivity.kt file. In the context menu that appears, hover over "New >" and click on "Kotlin Class/File".
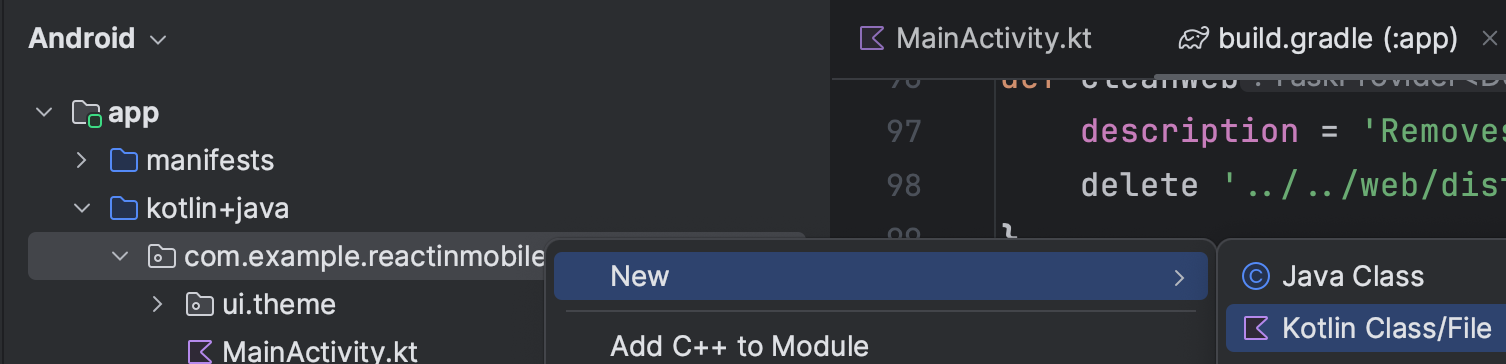
In the "New Kotlin Class/File" dialog, enter the ComposeWrappedWebView name and press return. This will create a new ComposeWrappedWebView.kt class file right next to the existing MainActivity.kt file.
Delete the class ComposeWrappedWebView and the curly braces that follow it. We will replace this with a ComposeWrappedWebView function.
Now import some key packages in the ComposeWrappedWebView.kt file. These go after the package declaration on the 1st line.
// The built in Android WebView
import android.webkit.WebResourceRequest
import android.webkit.WebResourceResponse
import android.webkit.WebView
import android.webkit.WebViewClient

// Import the WebViewAssetLoader
// This is part of the AndroidX WebKit library
// The gradle dependency is `androidx.webkit:webkit:1.9.0`
// See the gradle file for more details
import androidx.webkit.WebViewAssetLoader
import androidx.webkit.WebViewAssetLoader.AssetsPathHandler
5b. Create a ComposeWrappedWebView Composeable function
Now we will create a Jetpack Compose wrapper for the WebView component. This will allow us to use the WebView component in our Jetpack Compose app. Add the following code to your ComposeWrappedWebView.kt file:
@Composable
fun ComposeWrappedWebView() {
    AndroidView(
        factory = { context ->
            val assetLoader = WebViewAssetLoader.Builder()
                .addPathHandler("/assets/", AssetsPathHandler(context))
                .build()

            WebView(context).apply {
                layoutParams = ViewGroup.LayoutParams(
                    ViewGroup.LayoutParams.MATCH_PARENT,
                    ViewGroup.LayoutParams.MATCH_PARENT
                )

                /**
                 * Enable JavaScript in the WebView
                 * This is required to load JS in the WebView
                 * The compiler will warn you that this can cause XSS security issues
                 * but since we are loading our own assets, this is not a concern
                 * hence the `@Suppress("SetJavaScriptEnabled")` annotation
                 */
                @Suppress("SetJavaScriptEnabled")
                settings.javaScriptEnabled = true

                webViewClient =  object : WebViewClient() {
                    override fun shouldInterceptRequest(
                        view: WebView,
                        request: WebResourceRequest
                    ): WebResourceResponse? {
                        return assetLoader.shouldInterceptRequest(request.url)
                    }
                }

                /**
                 * This is the URL that will be loaded when the WebView is first
                 * The assets directory is served by a domain `https://appassets.androidplatform.net`
                 * Learn more about the WebViewAssetLoader here:
                 * https://developer.android.com/reference/androidx/webkit/WebViewAssetLoader
                 */
                loadUrl("https://appassets.androidplatform.net/assets/dist/index.html")
            }
        },
        update = {}
    )
}
After pasting this code several class names will show in red with an error message when you hover over them with the mouse cursor.
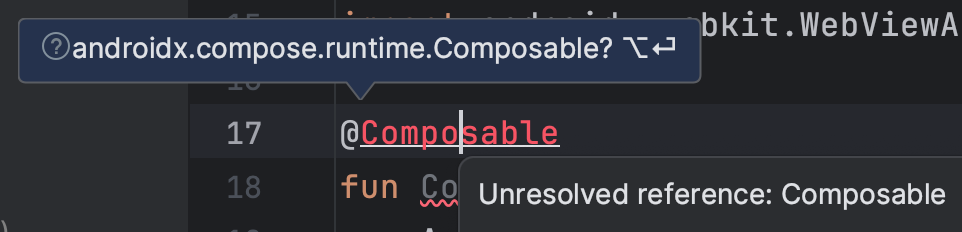
Click on the @Composable annotation, hold the option (⌥) key and press return. Let go of option and press return again or click on the selected "Import class 'Composable'" quick fix.
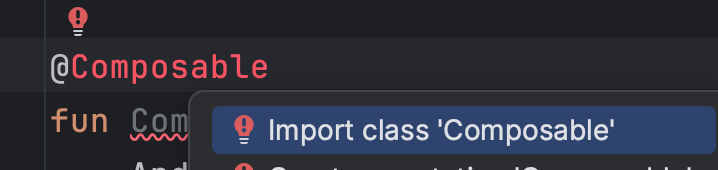
This will automatically add the missing import for the Composable class. Repeat these steps to add imports for the other class and function names showing in red (AndroidView and ViewGroup).
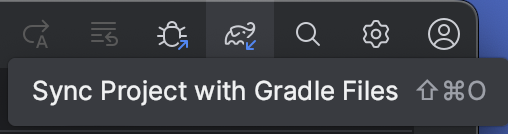
After adding these imports, click the elephant button in the upper right corner to "Sync Project with Gradle Files" (also available under the "File" menu).
ComposeWrappedWebView Commentary
The WebViewAssetLoader is used to load assets from the assets directory in the Android app. If you take a look at the copyDistToAssets gradle task in the app/build.gradle file, you'll see that it copies the web/dist directory into the app's assets directory. This is how the app can load the React app from inside the Android app. However, the index file references local JS and CSS files using relative paths (due to the base URL we added to the Vite config).
<script type="module" crossorigin src="./assets/index-7db404a0.js"></script>
<link rel="stylesheet" href="./assets/index-d526a0c5.css" />
The WebViewAssetLoader serves a locally accessible domain https://appassets.androidplatform.net that the WebView can load directly.
The Android View layoutParams configuration is used to make the WebView fill the entire screen.
layoutParams = ViewGroup.LayoutParams(
    ViewGroup.LayoutParams.MATCH_PARENT,
    ViewGroup.LayoutParams.MATCH_PARENT
)
In addition, JavaScript is enabled in the WebView. This is required to load the JS files in the WebView. The compiler will warn you that this can cause XSS security issues but since we are loading our own assets, this is not a concern, hence the @Suppress("SetJavaScriptEnabled") annotation.
@Suppress("SetJavaScriptEnabled")
settings.javaScriptEnabled = true
6. Add the ComposeWrappedWebView to your MainActivity
Now let's load the ComposeWrappedWebView in our MainActivity. Replace the code in your MainActivity.kt file with the following:
class MainActivity : ComponentActivity() {
    override fun onCreate(savedInstanceState: Bundle?) {
        super.onCreate(savedInstanceState)
        setContent {
            ReactInMobileTheme {
                // A surface container using the 'background' color from the theme
                Surface(
                    modifier = Modifier.fillMaxSize(),
                    color = MaterialTheme.colorScheme.background
                ) {
                    ComposeWrappedWebView()
                }
            }
        }
    }
}
7. Run the app in the Android Emulator or on a physical device
You can run the app in the Android Emulator or on a physical device. You should see the React app running in the WebView.
Now we're done! You can now run your React app locally in an Android app. This is what the final result should look like:
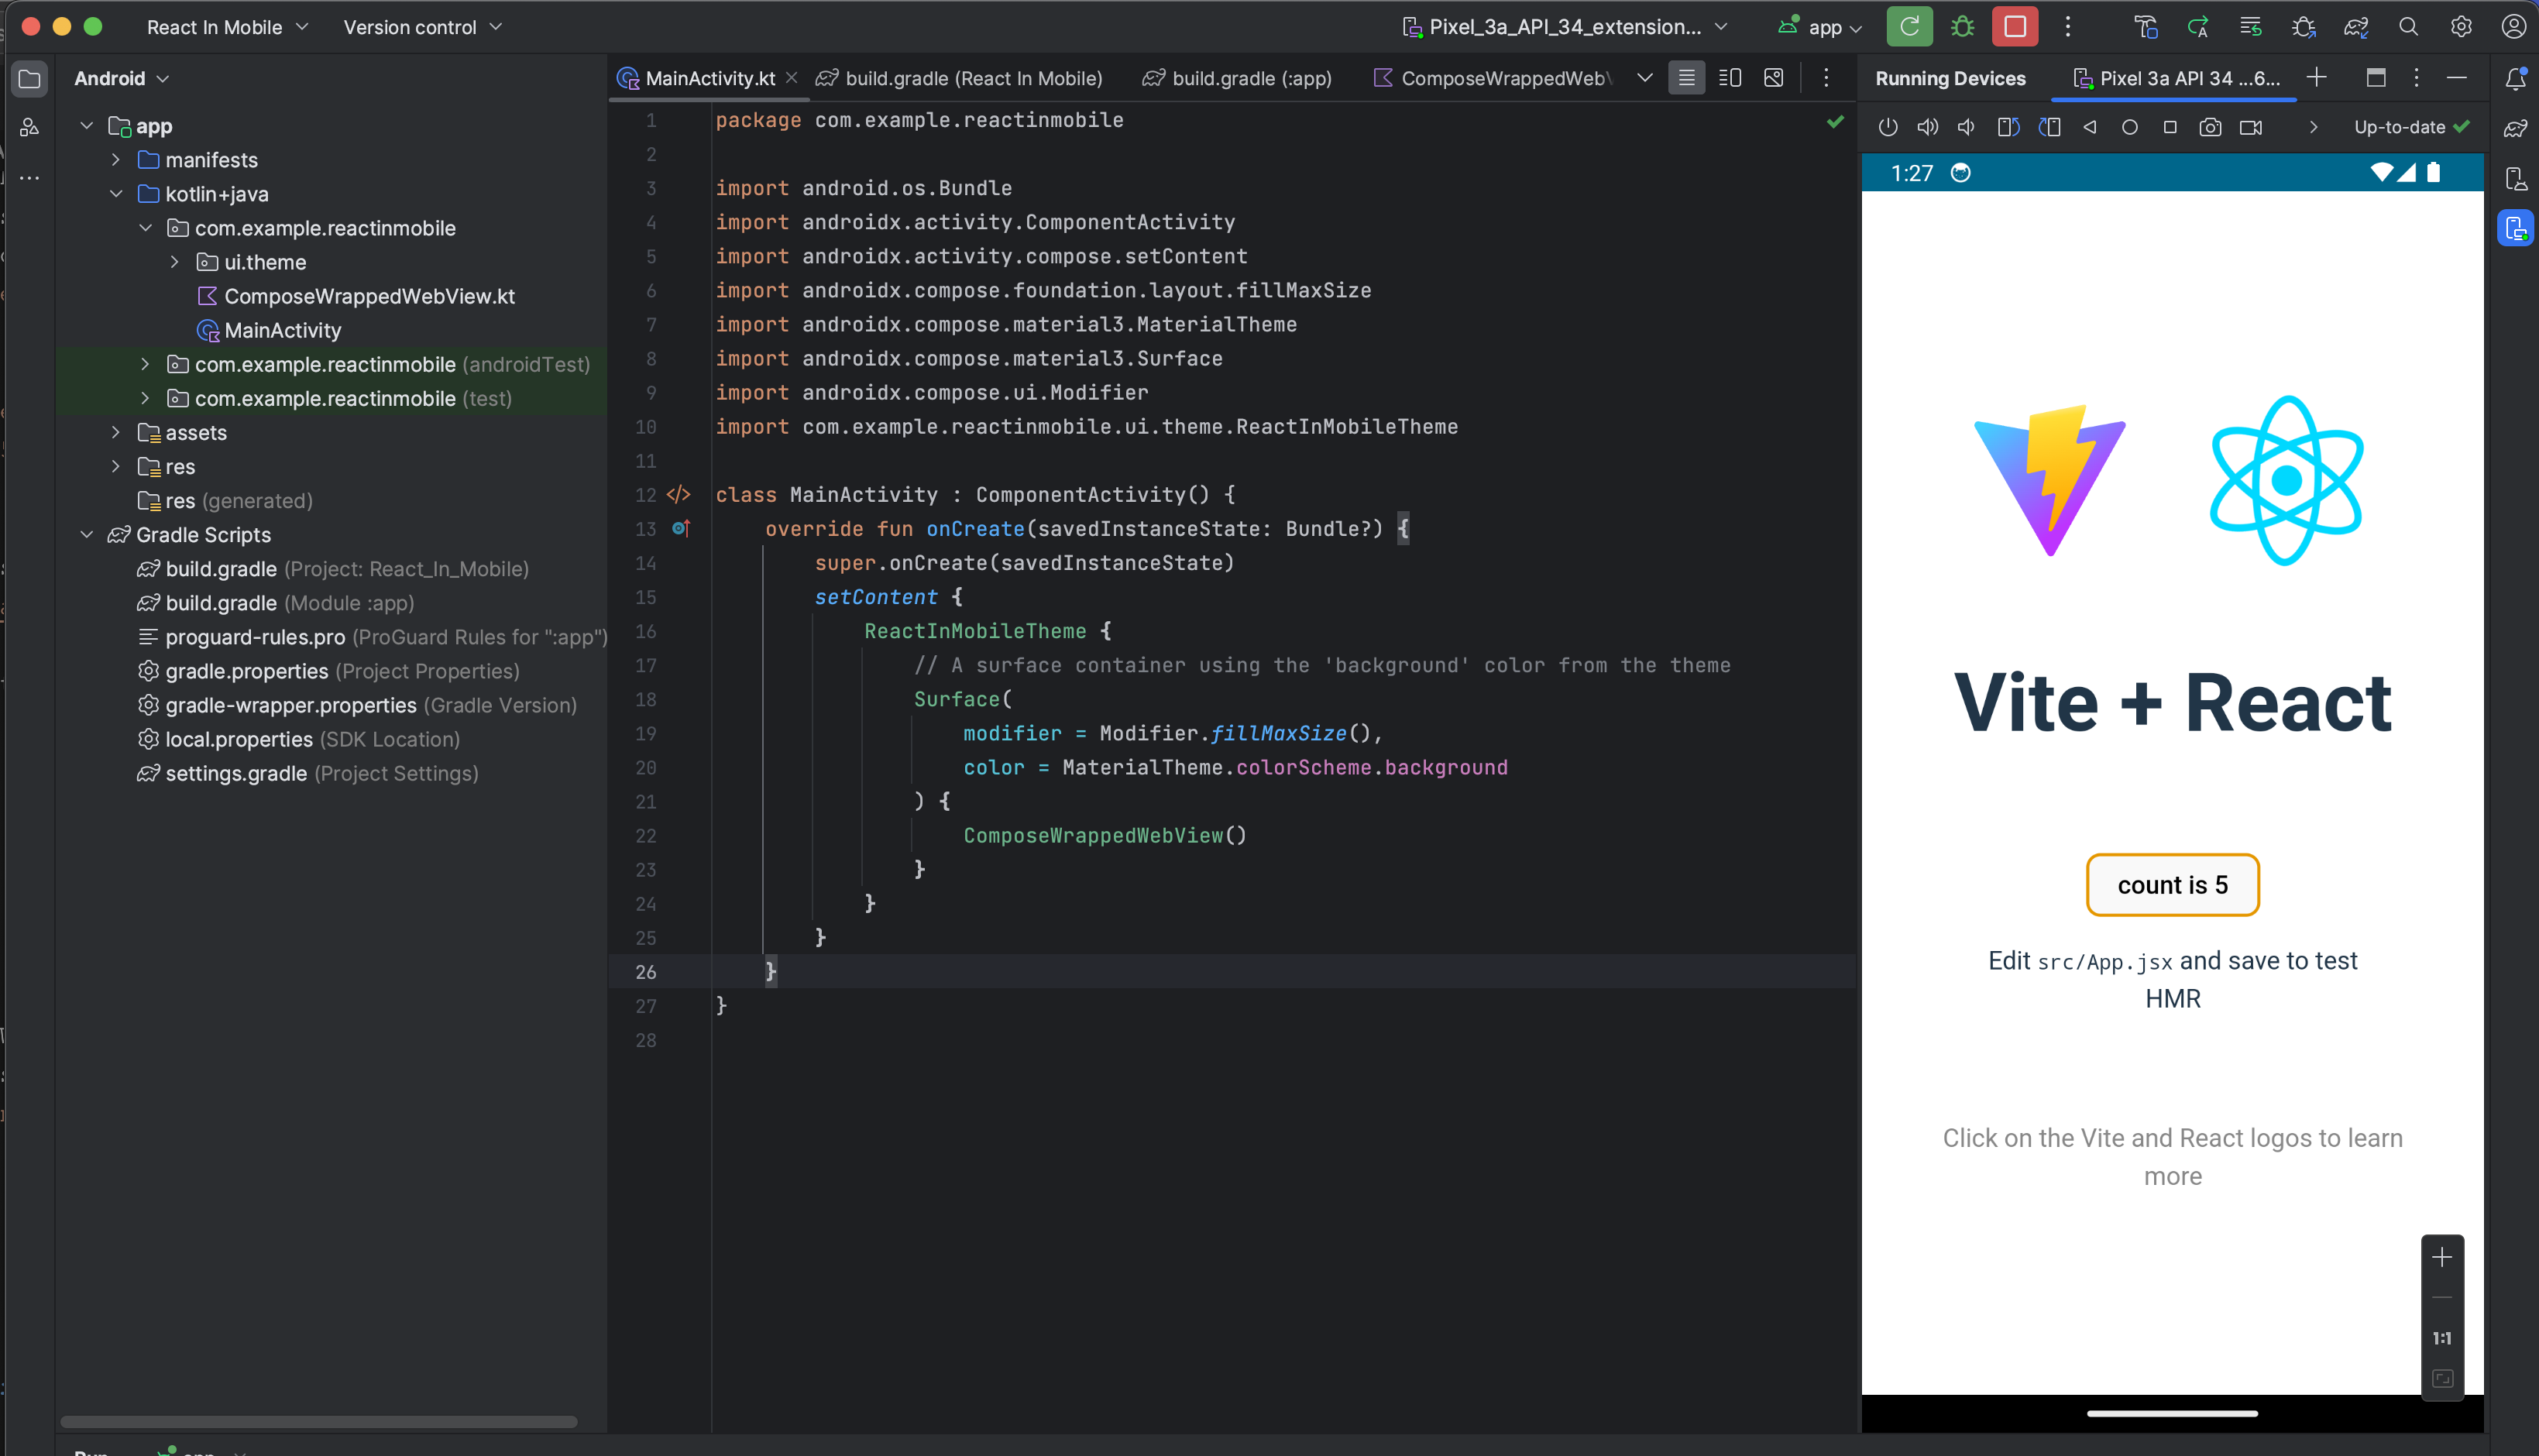
At this point you have a React app running inside an Android WebView! Changes made to the app in the web folder will automatically be copied into the Android app each time you build and run it. This allows you to quickly iterate on the app using the local Vite web server and a deskop browser. Then, you can spin it up in the Android WebView to check layout and test the app.
Be sure to checkout the final source code on GitHub